


I haven’t used that map, but I’d recommend scaling your pieces up by about 10-20% to keep things proportional. Test fit as you go to make sure it works.
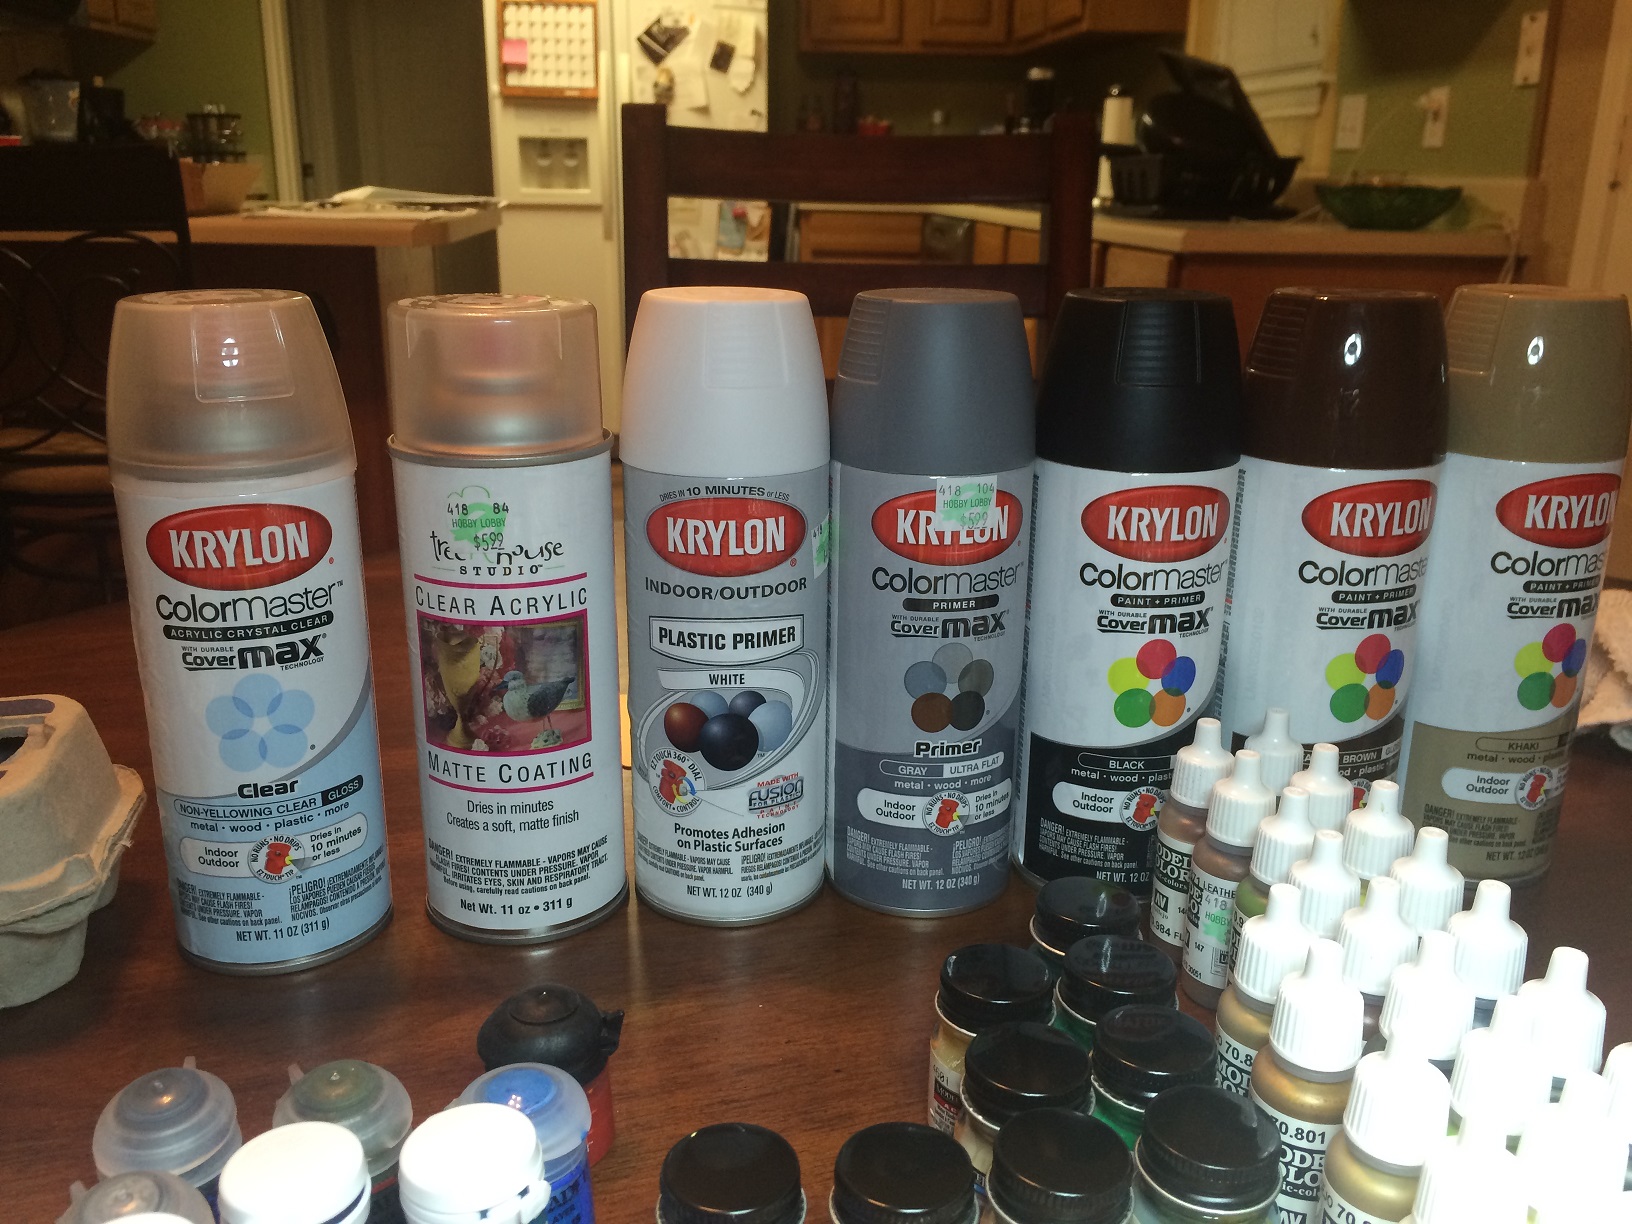
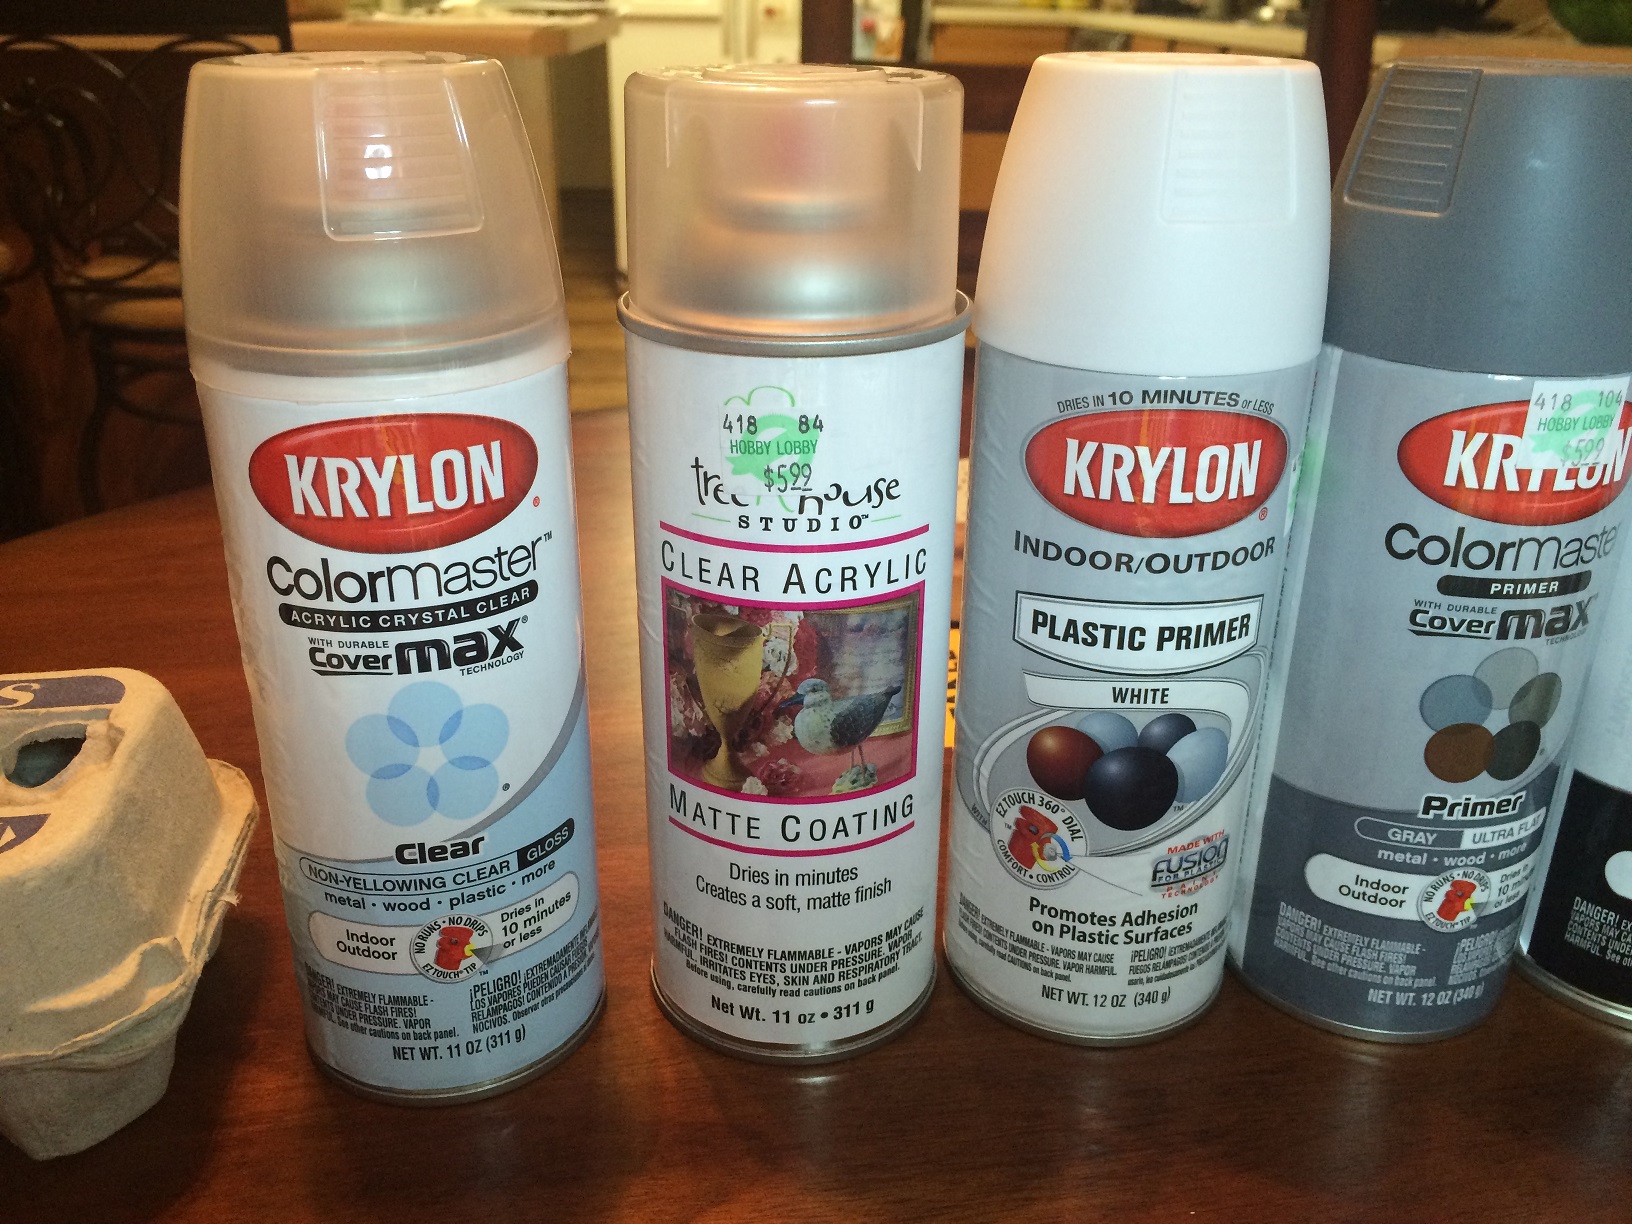
John Brown's Painted Axis and Allies Pieces
-
Here are the fourth set of pictures. :-)

-
Here is the last set of pictures for supplies. :-)

-
As you can see I have plenty of supplies. I think the problem was more of my method than the supplies, but I will let you all determine what I was doing wrong.
At the current moment, I’m working on the night camo for the German air force. I’m doing 27 planes in this scheme. I’m currently about to start the windows, nose pieces and stripes, tonight.
The only question is, do I protect the paint before I put the decals on, or do I do the decals before I protect the paint with a gloss or matte coat?
One person has answered, but is there more than one way of doing things, when it comes to decals?
How much setting solution do you put on the plane? Is there a thing as too much?
These are questions that would help me. :-)
Thanks,
John
Wow, you have quite the stock of supplies there! I’m very jealous, especially of your Vallejo paints - they’re purportedly the best. I can’t immediately identify any problems from your supplies. It all looks in order. You do have three different kinds of paints, so you are dealing with three different consistencies, three different drying times, etc.
Decals: I know someone offered their method earlier, which was to put decals on after the protective spray. It seems to work for him, so I guess it should work for you. I personally put the decals on before I spray the piece with enamel, in hopes that the enamel will coat the decals as well and provide an extra level of protection to keep the decal on the piece. That works for me, so it should work for you. Sounds like it comes down to personal preference.
You only need a little dab of decal solution where you want to put the decal. You may even want to dab it onto the piece and soak up any extra so that it doesn’t create a puddle. For example… when I apply decals to the wings of planes, I brush some solution over the wing of the plane, but I don’t want to put so much that the decal is swimming in solution when I apply it. Your solution application should be pretty localized. I don’t want to dip my piece in a vat of solution lol.
-
I think you nailed my problem. I think I’m soaking my plane with setting solution to get the decal on where I want it. Could that be messing my paint jobs? :?
-
I think you nailed my problem. I think I’m soaking my plane with setting solution to get the decal on where I want it. Could that be messing my paint jobs? :?
Quite possibly. When you say soaking the plane, do you mean literally covering the whole plane in solution, or just applying liberally in the areas that you are putting the decals?
The nice thing about acrylic paints is that they reconstitute very well with water or watery liquids. (They become runny again). This can be used to your advantage when your paint in the palette is drying out, but it will cause you problems when you apply too much on your finished paint job. So yes, the decal solution can ruin your paint job if you put a lot on, just as your paint job would be ruined if you dip your piece in water and run your brush over it a few times.
Applying to liberally on the plane, itself, I’m afraid. :oops:
-
I just finished all the cockpits on the night camo. Tomorrow I will do the nose, engines and stripes to some of the planes.
If I follow all of your instructions to a tee, I should have something to view at the end of the week, if not sooner. :-D
-
The real test will be the German green camo planes for me, but these black German night camo planes is a good scheme for beginners, like me, LOL.
Wish me luck guys on this first batch! I’m really trying to learn, LOL. :-D
-
Guys, hopefully, by Sunday, I will have phase 1 of 5 of the Luftwaffe done. That is 27 planes in the black night camo, with 9 having yellow noses and stripes, 9 with white noses and stripes and the last 9 are all black.
I’ve been working extra hard on these. The only thing I have left is for them to dry, then I will put a protective coat, then decals and finally more protective coating.
I have followed little bit of everyone’s advice, except the washing of the pieces. that was my only mistake so far.
Wish me luck on putting the decals on without making a mess of the paint. :-D
Thanks,
John
-
Good luck :)
Hope to see pictures soon.
I have two small palanes from Revell to paint as test subjects before i start painting A&A figures :D
Maybe some risk figures as well … I wouldnt want to mess up everything :) -
Good luck :)
Hope to see pictures soon.
I have two small palanes from Revell to paint as test subjects before i start painting A&A figures :D
Maybe some risk figures as well … I wouldnt want to mess up everything :)Well, if your beginning like me, you can expect a couple of mistakes for sure. You can ask any painter, and I bet everyone has made a mistake in their paint jobs, here and there, but I’m having fun and learning. I hopefully will get better, as time goes on.
I can’t wait too see what you come up with, on your paint jobs, and good luck to you, as well.
Tuesday would be the latest on my planes, but I have over 100 decals to put on these planes, and yes, I will need all the luck, I can get, because decals are very hard too do.
Thanks for the comments! :-)
John
-
Hey John, sorry I have been preoccupied playing league games, hehe. You have quite the setup. Very nice!
I mostly use Vallego paints except for the primer and sealer. One thing you might want to consider is a carousel for your paints. I have over 200 paints and it was difficult to find them sometimes. I got this cheap carousel from the war store. It helps me locate the color I want. http://www.thewarstore.com/product44011.html
For spray paints I love Plastic Soldier paints but they are difficult to find in the US. I have been using Army Paints instead since the other is not available.
For decals I use Vallejo Decal fix. I apply only to where I want to put the decal and let dry at least 15 minutes. Then I put a small drop of water on the same spot and brush it lightly. Next I place the wet decal from a brush onto the piece and move it until it is in place. Next I take a small tissue to absorb the excess water and the decal flattens to the piece.
Good Luck and hope to see your work soon.
-
Hey John, sorry I have been preoccupied playing league games, hehe. You have quite the setup. Very nice!
I mostly use Vallego paints except for the primer and sealer. One thing you might want to consider is a carousel for your paints. I have over 200 paints and it was difficult to find them sometimes. I got this cheap carousel from the war store. It helps me locate the color I want. http://www.thewarstore.com/product44011.html
For spray paints I love Plastic Soldier paints but they are difficult to find in the US. I have been using Army Paints instead since the other is not available.
For decals I use Vallejo Decal fix. I apply only to where I want to put the decal and let dry at least 15 minutes. Then I put a small drop of water on the same spot and brush it lightly. Next I place the wet decal from a brush onto the piece and move it until it is in place. Next I take a small tissue to absorb the excess water and the decal flattens to the piece.Â
Good Luck and hope to see your work soon.
Thanks buddy for information. I will keep some of this in mind. :-D
Thanks again!
John
-
Guys, I’m almost finished with the First Phase of the German Luftwaffe in the Night Camo Scheme. I got 10 more to decal and a final protective coat as well as touch ups. I should be able to post pictures, by Tuesday. Sorry for the delay, but I had to learn some things I was doing wrong.
One of the big things I was doing wrong guys was separating the decal off the paper as it was on the plane and sometimes the decal would shift off the paper on the wrong part of the plane, and I was using tweezers, which made it hard, when your sliding it off the paper, when it is on the plane.
I finally realized I should use the tweezers to pull the decal off the paper and switch to a needle to place the decal on the plane.
This made it so much easier, and I use a lot less setting solution, as well.
I also realize, I will never paint light colored noses and fuselage stripes, after putting a dark coating, such as black, on ever again.
For now on, if I have a different colored nose and stripes to a plane, I will paint those on first, after the primer.
The yellow on black was a pain in the rear, too say the least.
For a beginner, I think I did really well, but I will let you all judge for yourselves, Tuesday.
I just wanted to give everyone an update, because I know you have been waiting patiently. :-D
Thanks,
John
-
Guys, I finished the first phase of the Luftwaffe, and I will post pictures after 9 pm CST, tomorrow night. I want the protective coat to dry for 24 hours.
I can’t wait for you all to see these, I’ve worked very hard on these. :-D
John
-
Just wanted to let you all know, I will post any pieces I paint on boardgamegeek, including the ones, I will posting tonight.
Thanks for viewing! :-D
John
-
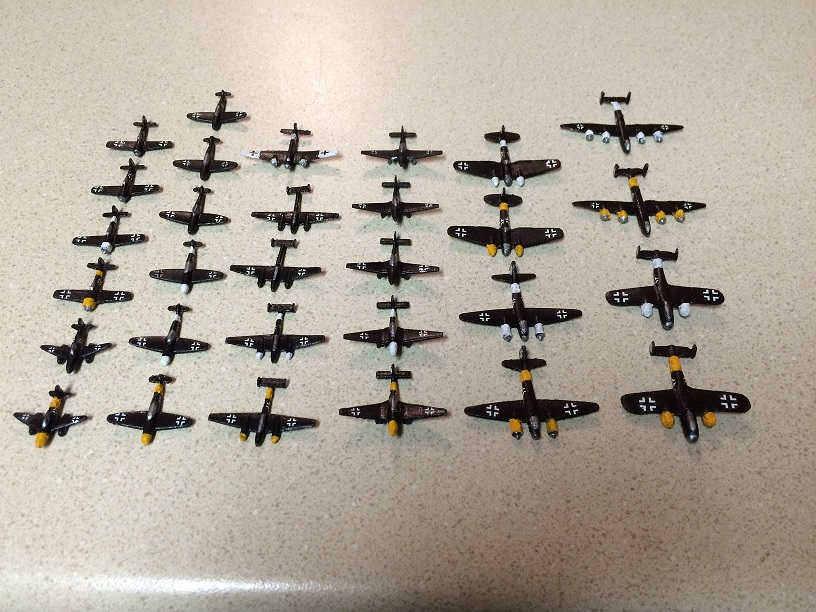
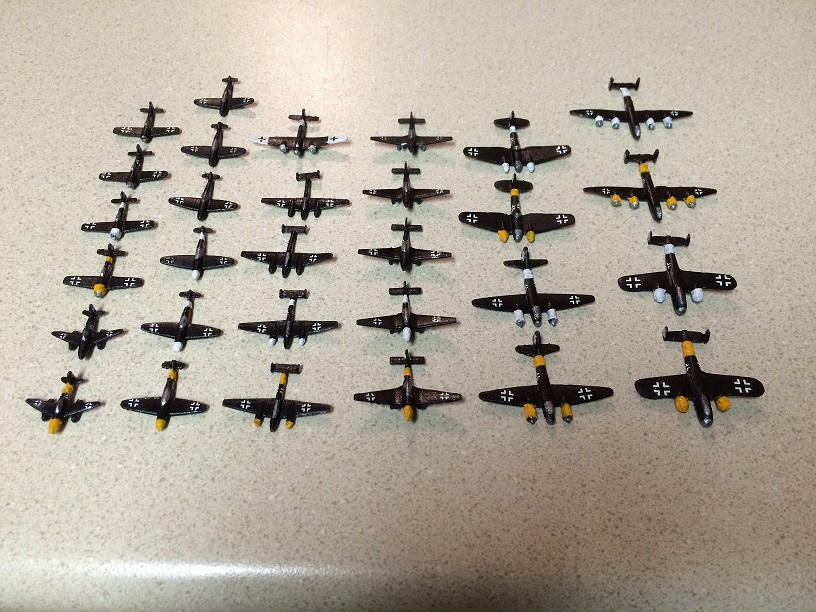
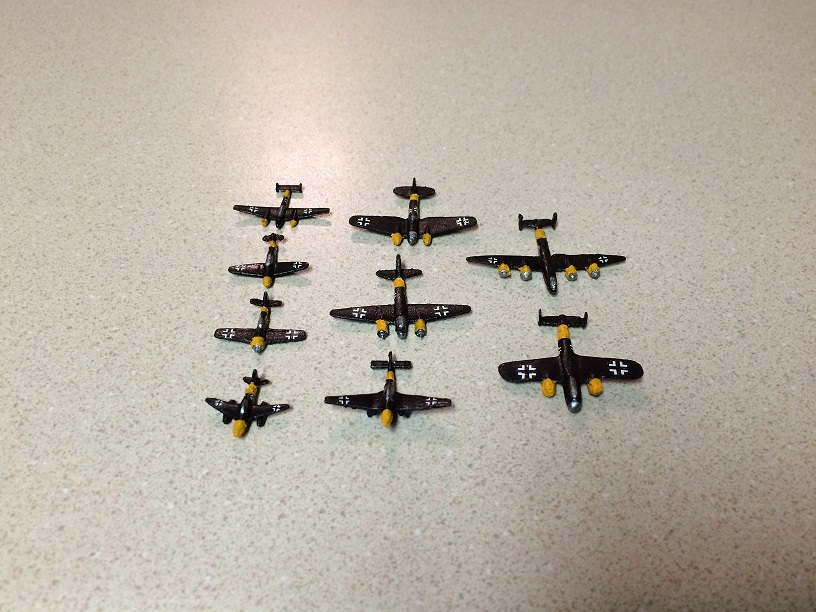
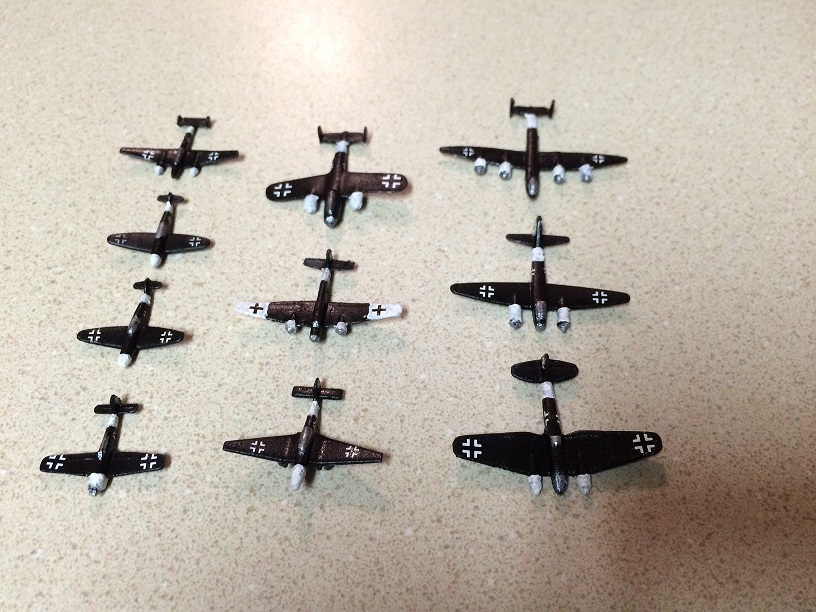
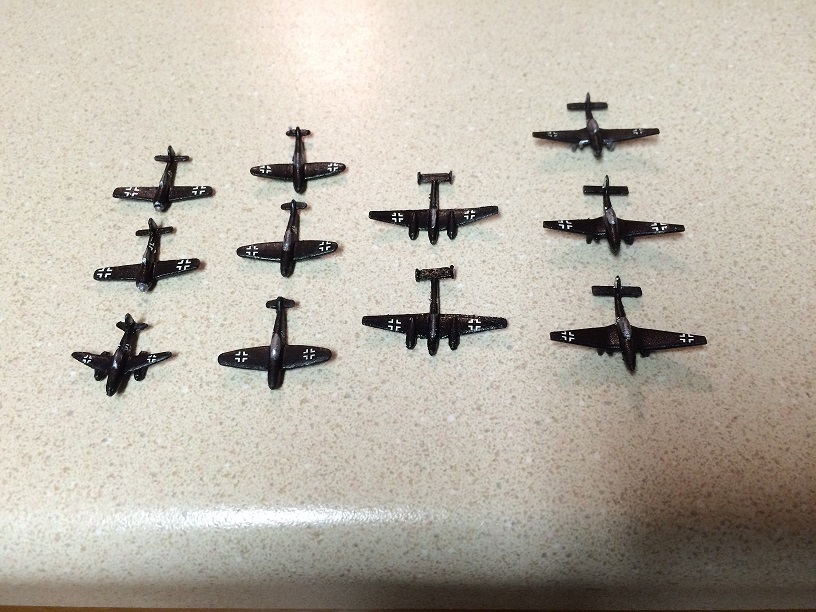
PHASE ONE of FIVE CAMO SCHEMES of the GERMAN LUFTWAFFE
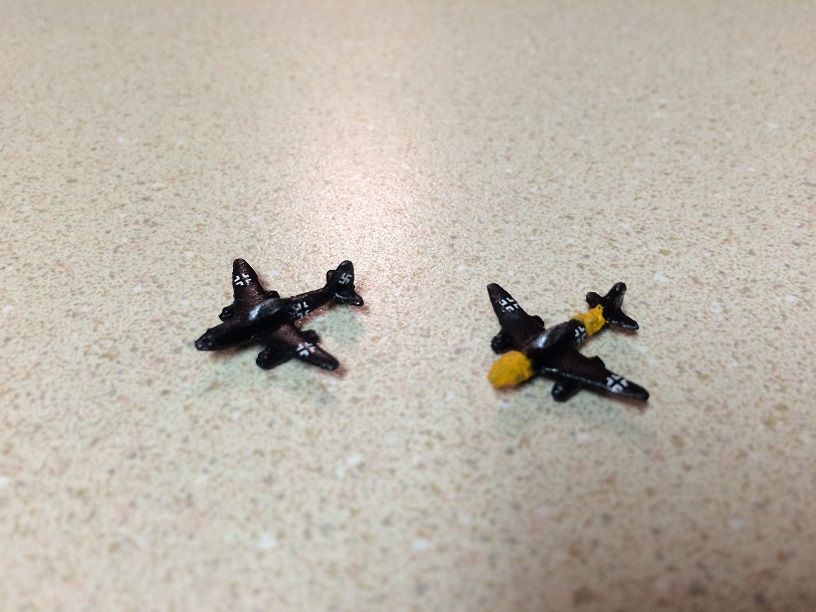
German Luftwaffe Painted in the Night Camo Scheme consisting of 30 planes: The original 3 Night Camo Planes are included in this group, which consists of two BF 109’s and a Stuka dive bomber. Enjoy! :-D
As night falls on the European landscape, the Luftwaffe pounces on its prey, like banshees screaming through the crisp night air, and suddenly the battle was over, before it began.
The first two pictures are all 30 planes together.
-
The next two pictures are planes with the yellow markings and white markings. :-D
-
The next two pictures is the planes in all black, and a picture of the Me-262 Jetfighters. :-D
Suggested Topics

