


@chrisbump86 You are welcome! I will be posting a new version soon for global as i’ve finally got a copy. Many days of customizing are coming up.
AA50 3-D Terrain Gaming Table (COMPLETED July 20, 2010)
-
I started this table well over a year ago now, but have not been working on it very consistently until recently (I would work for a few weeks here and there on it and then go away for weeks, if not months at a time before I touched it again).
Now that the nice weather has arrived here in Southern Ontario, I’ve had much more time in my workshop to do some things … so, without further ado;
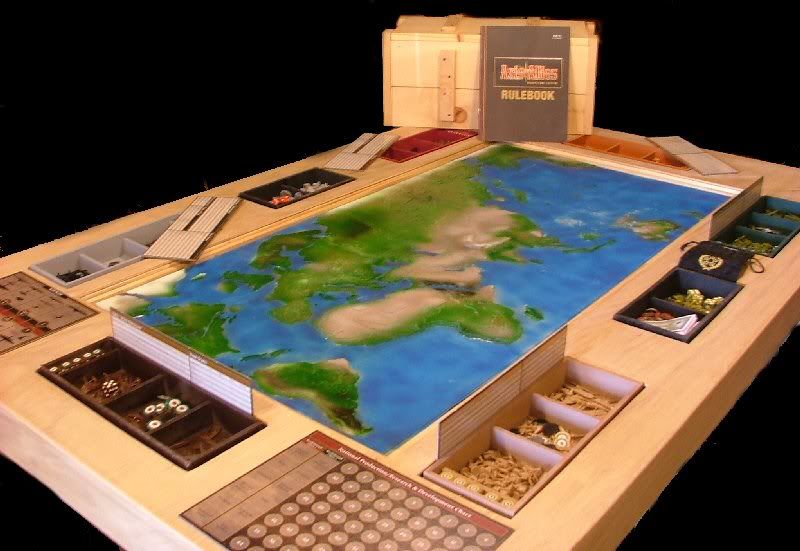
My AA50 3D Topographical Gaming Table Build
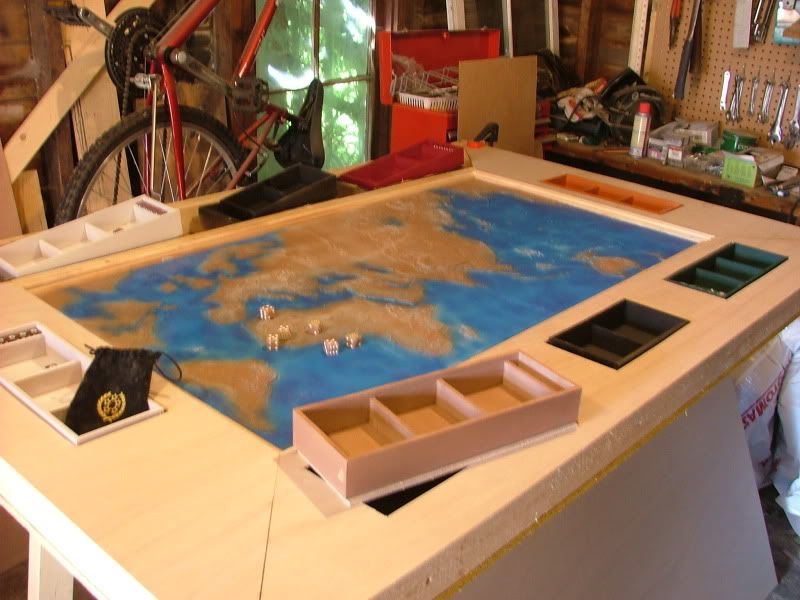
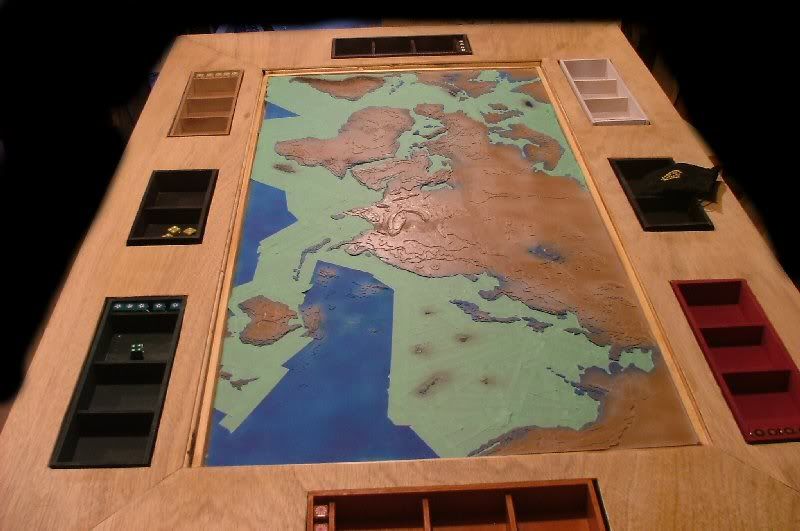
As you can see, I’m working on getting the table top finished. Still one side to go.
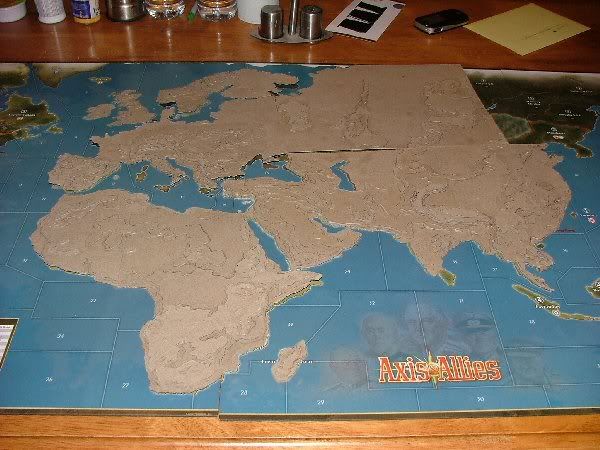
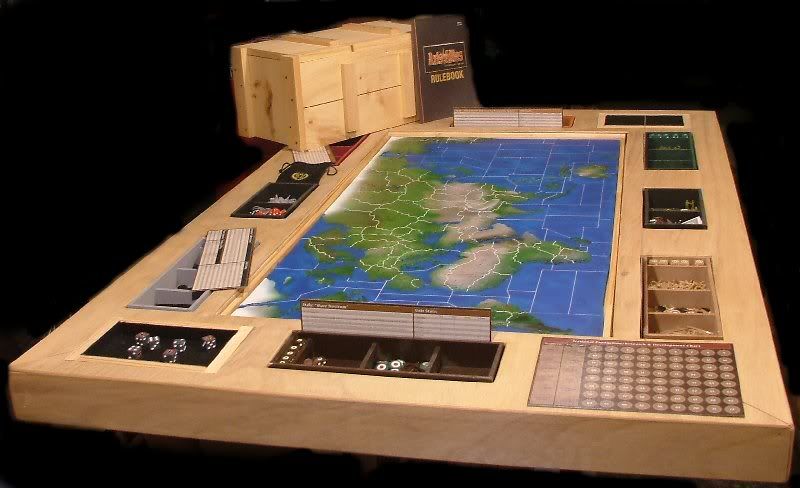
I’ve got trays from the FMG Combat Chest (re-painted, which is why they lack the country name and a couple aren’t the right color yet) inserted into the table (removable … they sit inside a slightly larger box built directly into the table and painted matte black).The map was created by first tracing the AA50 game board onto tracing paper. I then used an atlas to interpret various elevations throughout the entire game board and drew them freehand onto the trace paper.
From there it was a matter of cutting out a continent, tracing it onto thick cardstock (cardboard backing boards, like the ones they use on pads of paper), cutting that out and then cutting out each elevation on the trace paper, transfering to the cardstock, and repeating the process over and over again until a continent was complete and all elevations were glued together onto the continents base with contact cement.
This process alone took a LOT of time, but it kept me out of trouble for a few months ;)
I then went through 2 other variations of the table construction itself before settling on the one I have here (though I wish I had used 1x3’s instead of 2x3’s … the weight on this thing is incredible).
So, still to complete is ;
-
The one side of the table top itself, cover the 4 sides of the table and finish that with a nice clear-coat/laquer finish of some sort.
-
Spray-painting the terrain onto the game board
-
Drawing on all borders and seazones and transferring territory names (undecided how i’m doing this yet)
-
Cut down a sheet of glass to the proper size to fit over the game board
-
Cannibalize the poker table or another folding table for legs
-
Paint my game pieces (not related to the table but a future plan none-the-less
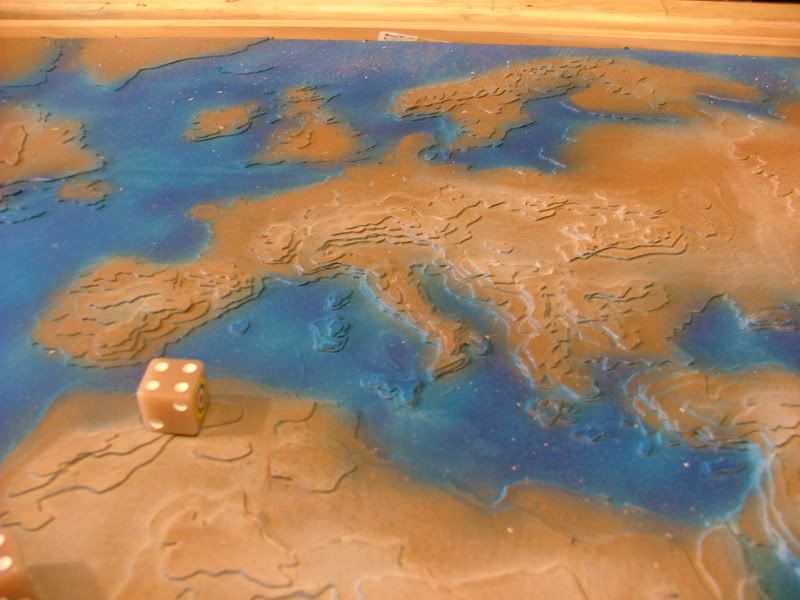
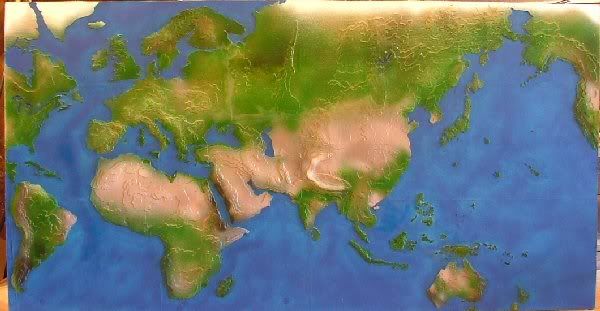
Some close-ups of the map itself ;
Europe :
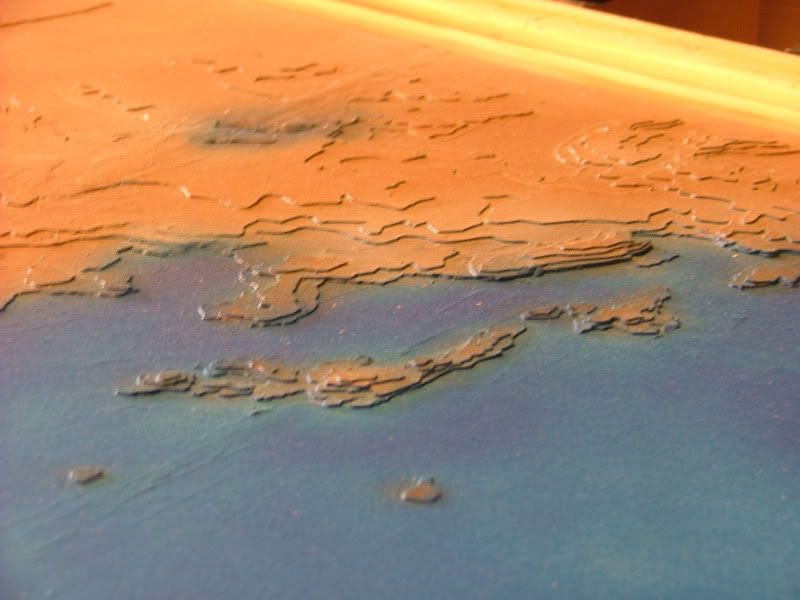
Japan :
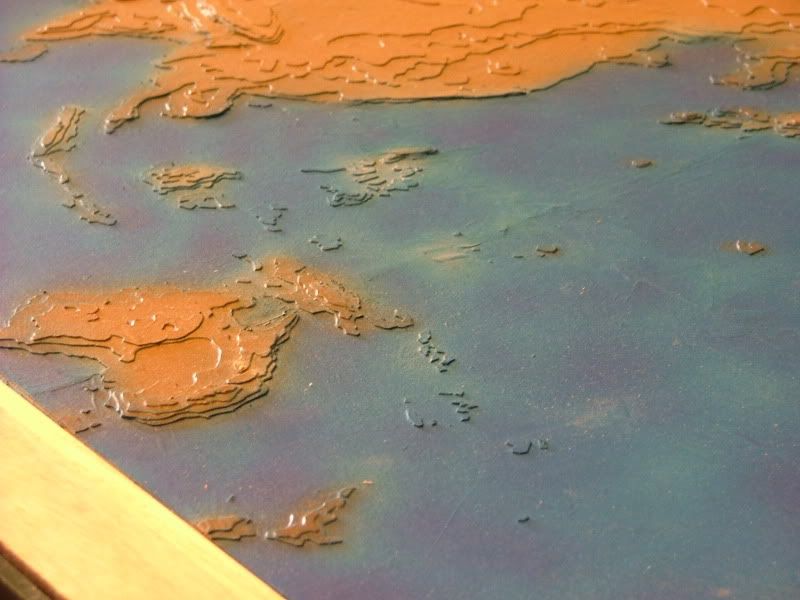
The Pacific with Australia :
-
-
Wow…nice work…could be a bit of a pain keeping units on the map or moving them over from one territory to another.
You are in Southern Ontario? I am in Ancaster…have been playing the game for 25 years…Other than my brother and a couple of friends who are too far away…it would be nice to find new opponents. I am in Hamilton
-
oops…I missed reading about the glass table top…Looks great!
-
You are in Southern Ontario? I am in Ancaster…have been playing the game for 25 years…Other than my brother and a couple of friends who are too far away…it would be nice to find new opponents. I am in Hamilton
I’m in Oshawa (east side of the GTA). We’ve got a couple of small groups out here that play with various members swaping back and forth between the groups.
Hamilton may be a bit far to travel for a casual game, unless you’re that much of a diehard. lol.
I’m off for 5 days after tommorow (thurs-monday) so I should have some more updates to make here. I’ve taped off all of the water over the past couple of evenings so I can make a go at spraying the land properly (without mudying up the oceans).
-
That’s looking sweet dude! Can’t wait to get a game in on it!
-
After a bit more work, I’ve finished the surface, all boxes, sanded and put on one coat (so far) of polyurethane, and, voila (fyi, the green is all painters tape masking off the sea zones so that i don’t overspray with the airbrush);

Still to do;
-
Finish Game Board (painting, borders, territory/sz’s)
-
Legs
-
Glass
-
-
Still to complete;
-
Borders/Seazones/Labels/Roundels
-
Glass top
-
Legs
-
-
Quite amazing
-
I second that
-
Awesome. How much is this going to cost you do you think. Not only would it be great to have a table like that, but I think it would be a lot of fun makinhg it as well.
-
@Col.:
Awesome. How much is this going to cost you do you think. Not only would it be great to have a table like that, but I think it would be a lot of fun makinhg it as well.
It’s been great fun making it (and it’s kept me out of trouble as my wife says).
To date I’ve spent in the neighbourhood of about $120, but some of the supplies I already had, and then again there were others that just got wasted because of mess-ups.
I figure the total cost will come in under $200.
I got a lot more done on the weekend but I havn’t got pictures to post yet. Later …
-
This is how I should have done this post from the beginning … but better late than never, right?
Here is a comprehensive breakdown of my AA50 3D Terrain Gaming Table from start to nearly finished;
In the beginning I rolled out tracing paper onto the AA50 Gameboard and traced the entire thing. I then began with the cardboard (the thickness of cardboard used on the backs of notepads would be the best example).
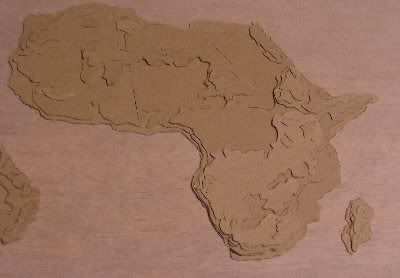
I would meticulously cut out each individual elevation from the tracing paper, trace them onto the cardboard, cut out the cardboard and contact cement them to the lower elevations until I had the entire continent completed.
First, I did Africa.
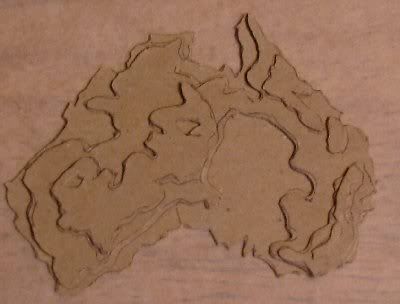
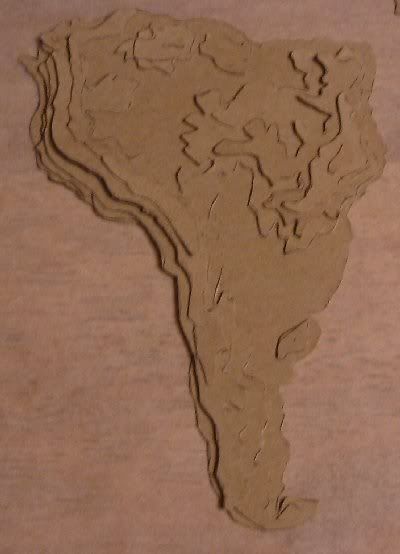
Then followed with Australia, Great Britain, South America and Europe/Asia, with North America for last.

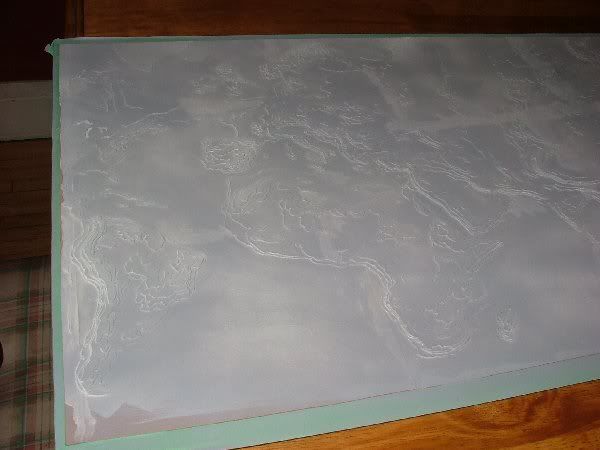
From this point I placed all of the continents onto a 1/4" sheet of MDF cut to the size of the AA50 Game board using, once again, contact cement and began placing all of the individual little islands (yes … every island, no matter how small was placed on the board).
Once the cardboard was all glued to the MDF, I primed the entire thing with spray primer.
By the time I had completed this portion, I had spent the better part of a month, possibly 2 and then set it all aside for a long long time. Once the warm weather hit and my workshop finally got set up and cleaned out (after having been here for 3 years and it being nothing more than storage/junkpile) I got to work on the rest of the table.
The first iteration of the table I ended up scraping as it was never, ever going to be straight or level. Instead I ended up using a sheet of OSB to replace the pine that I origonally used, keeping the 2x3 edges.
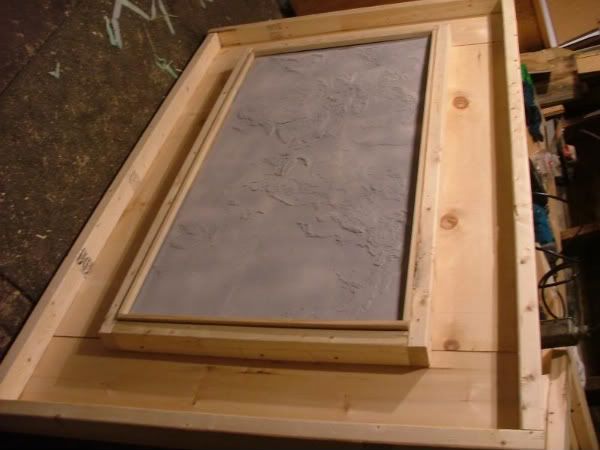
Once this portion of the table was done I built all of the boxes for my FMG Combat Chest trays to fit into. At this point I had started to airbrush the game board as well.
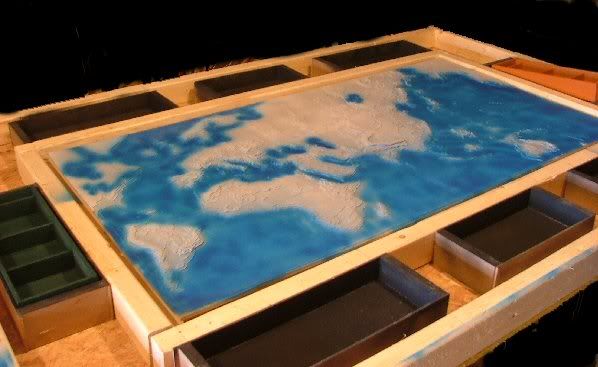
I then measured (a few times) and marked off the veneer top to cut the slots for the trays to sit under and glued it all together. While I waited for the glue to set and some foul weather to pass I taped off all of the water areas on the board so I could begin airbrushing the landmasses.
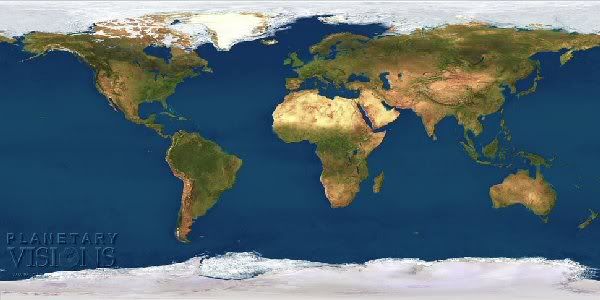
For the game board, I had wanted to match as closely as possible this satellite composite of the earth (taking into account the odd shape/sizing of the AA50 board);
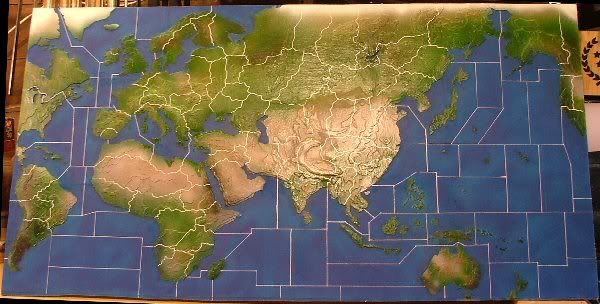
Once that had all dried, I could begin drawing on the borders and seazones with a fine tipped white paint pen and a ruler;
I later decided (on a suggestion from my brother) to put dice rolling trays in two of the corners, which I thought was a brilliant idea (plus it removed the couple of horrible joints I had)!
So, here is where we’re at now …
I still have to;
-
Label countries and seazones
-
Final coat of laquer
-
Trim off all the openings to make them look nicer/smoother
-
Glass top needs to be cut to size
-
Folding Legs
(is it just me or does this list get longer as I go along?)
From this point on there’s not much else I can show until it’s done.
I’ve spent just over $120 (canadian) at this point on this table and game board but taking into account the few items I already had from other projects, and the few items I still need to get to finish the job, I am going to guess a grand total of approximately $200 … and many many hours!
-
-
That is AWESOME! :-o
Well done, mate
-
Can’t wait to play on this table!
-
WOW.
I would pay for a replication of that map.
That 3D map is INCREDIBLE.
I can’t wait to see pictures of it labeled with the cities, sea zones, and countries.
Unreal.
You should consider making them and selling them.
I would love one of those broken into three sections (like the original AA50 map) with plastic on top of each section.
Fantastic.
-
Can’t wait to play on this table!
I second that one! Rorschach, you set a date yet? :-D
-
WOW.
I would pay for a replication of that map.
That 3D map is INCREDIBLE.
I can’t wait to see pictures of it labeled with the cities, sea zones, and countries.
Unreal.
You should consider making them and selling them.
I would love one of those broken into three sections (like the original AA50 map) with plastic on top of each section.Fantastic.
The table itself only takes a few hours to build, maybe a day.
The MAP on the other hand, I don’t think anyone would ever be willing to pay a reasonable amount considering the number of hours it has taken to make that. Even if I only charged $10 an hour for doing it, I’d probably be looking at 30+ hours, so $300+ just for one and that doesn’t even take into account materials! :-o -
Can’t wait to play on this table!
I second that one! Rorschach, you set a date yet? :-D
Patience boy, patience! Let me get it finished first. lol
-
That table is sweet. It has inspired me to start my own. I think I will wait for the World map from IL to come out and make it with that. Something interchangeable for all the games. I especially like the cutouts for the Ammo Box inserts. Very well done. I don’t see any place for the COMBAT TURRETS? ;-)
GREAT JOB. Love it.
Brian
www.TheDiceTurret.com -
any progres?
Just waiting on the glass top and I’m done, at which point I’ll post the rest of the pictures. I’m having some issues with the glass I planned on using.
Suggested Topics


