


I am working on painting my 1914 game pieces and would love to see what you all have done. Especially naval, artillery and plane units. Thanks!
-A Painting Tutorial and Resource for A&A Global-
-
Hey man - those look awesome! Love the BB especially.
In regard to the terrain basing… I use any and every (mostly for train sets, from turf to fine gravel) I try to stick to limiting certain types/colors consistently with one nation, makes it easy to ID at a glance (ref. my AA50th). But I do mix them up for ‘spotting’, these I haven’t posted yet. I call it spotting when I take some larger clumps/higher scale(?) of terrain and only put a bit in one spot - gives it the look of a bush or small tree. As far as applying any terrain, I simply sprinkle it on when the base paint is still fresh, the base paint being a color close to the nation’s color. No worries when/if you apply a clear coat, it helps. If you decide to try out some of the ‘thread like’ grasses that say… Gamesworkshop puts out, it’s a little more involved (well, at least I make it that way). After you sprinkle the threads on you do one more step, hold the mini upside down and tap it, I also brush the threads upwards around the base with a finger or a brush. This way the majority of the threads stick up like real brush. On my AA50th set I covered even the sides of the bases (and I didn’t use any thread grasses on them), but I kinda prefer to leave the sides of the bases their original color now (hindsight :| ). Hope that helps… let me know, I can try to explain further if need be.
-
No, that’s great info; thanks! I suppose I should just try it out myself to get the hang of things :lol:
-
Yeah, honestly, hands-on is the best way to go. Judging from the splendid detailing you’ve already done, should be a cake walk for ya with some cool looking results.
-
Enjoy!
So yesterday I whipped up some infantry and then practiced terrain basing…WOW, was I pleased with the results!!
Here are the materials I used.
1. Cut out egg container- This is what I used to make the glue mixture… you can use something else if you want. If you DO use the egg carton, make sure there are not small holes in the bottom, as many sections have 2 small holes. I figured it out the hard way a while ago- paint wash all over my desk :-P
2. One fairly stiff brush- This brush should be one you do not cherish, and it should be a little bit stiff, so you can paint glue where you want it.
3. Some terrain- Pick what you want. I went to Hobby Lobby for mine… $8 total. You want it to be pretty fine.
4. Tacky Glue- I would actually recommend PVA glue, but I couldn’t find any. So I used this. Its dirt cheap too.

To start out, make your basic infantry pieces. The only difference is, the base of the piece needs to be the color of the terrain you’re applying. (Oh, by the way, I figured out, the darker and more liberally you apply the paint wash, the better the pieces look IMO. just go back over the flesh and the gun, as those are parts you don’t really shadow.)
Desert/Sand- Light brown or tan
Grass/Forest- Olive Green
Dirt/Rocks- Brown
Cobblestone/Gravel/Urban- Grey
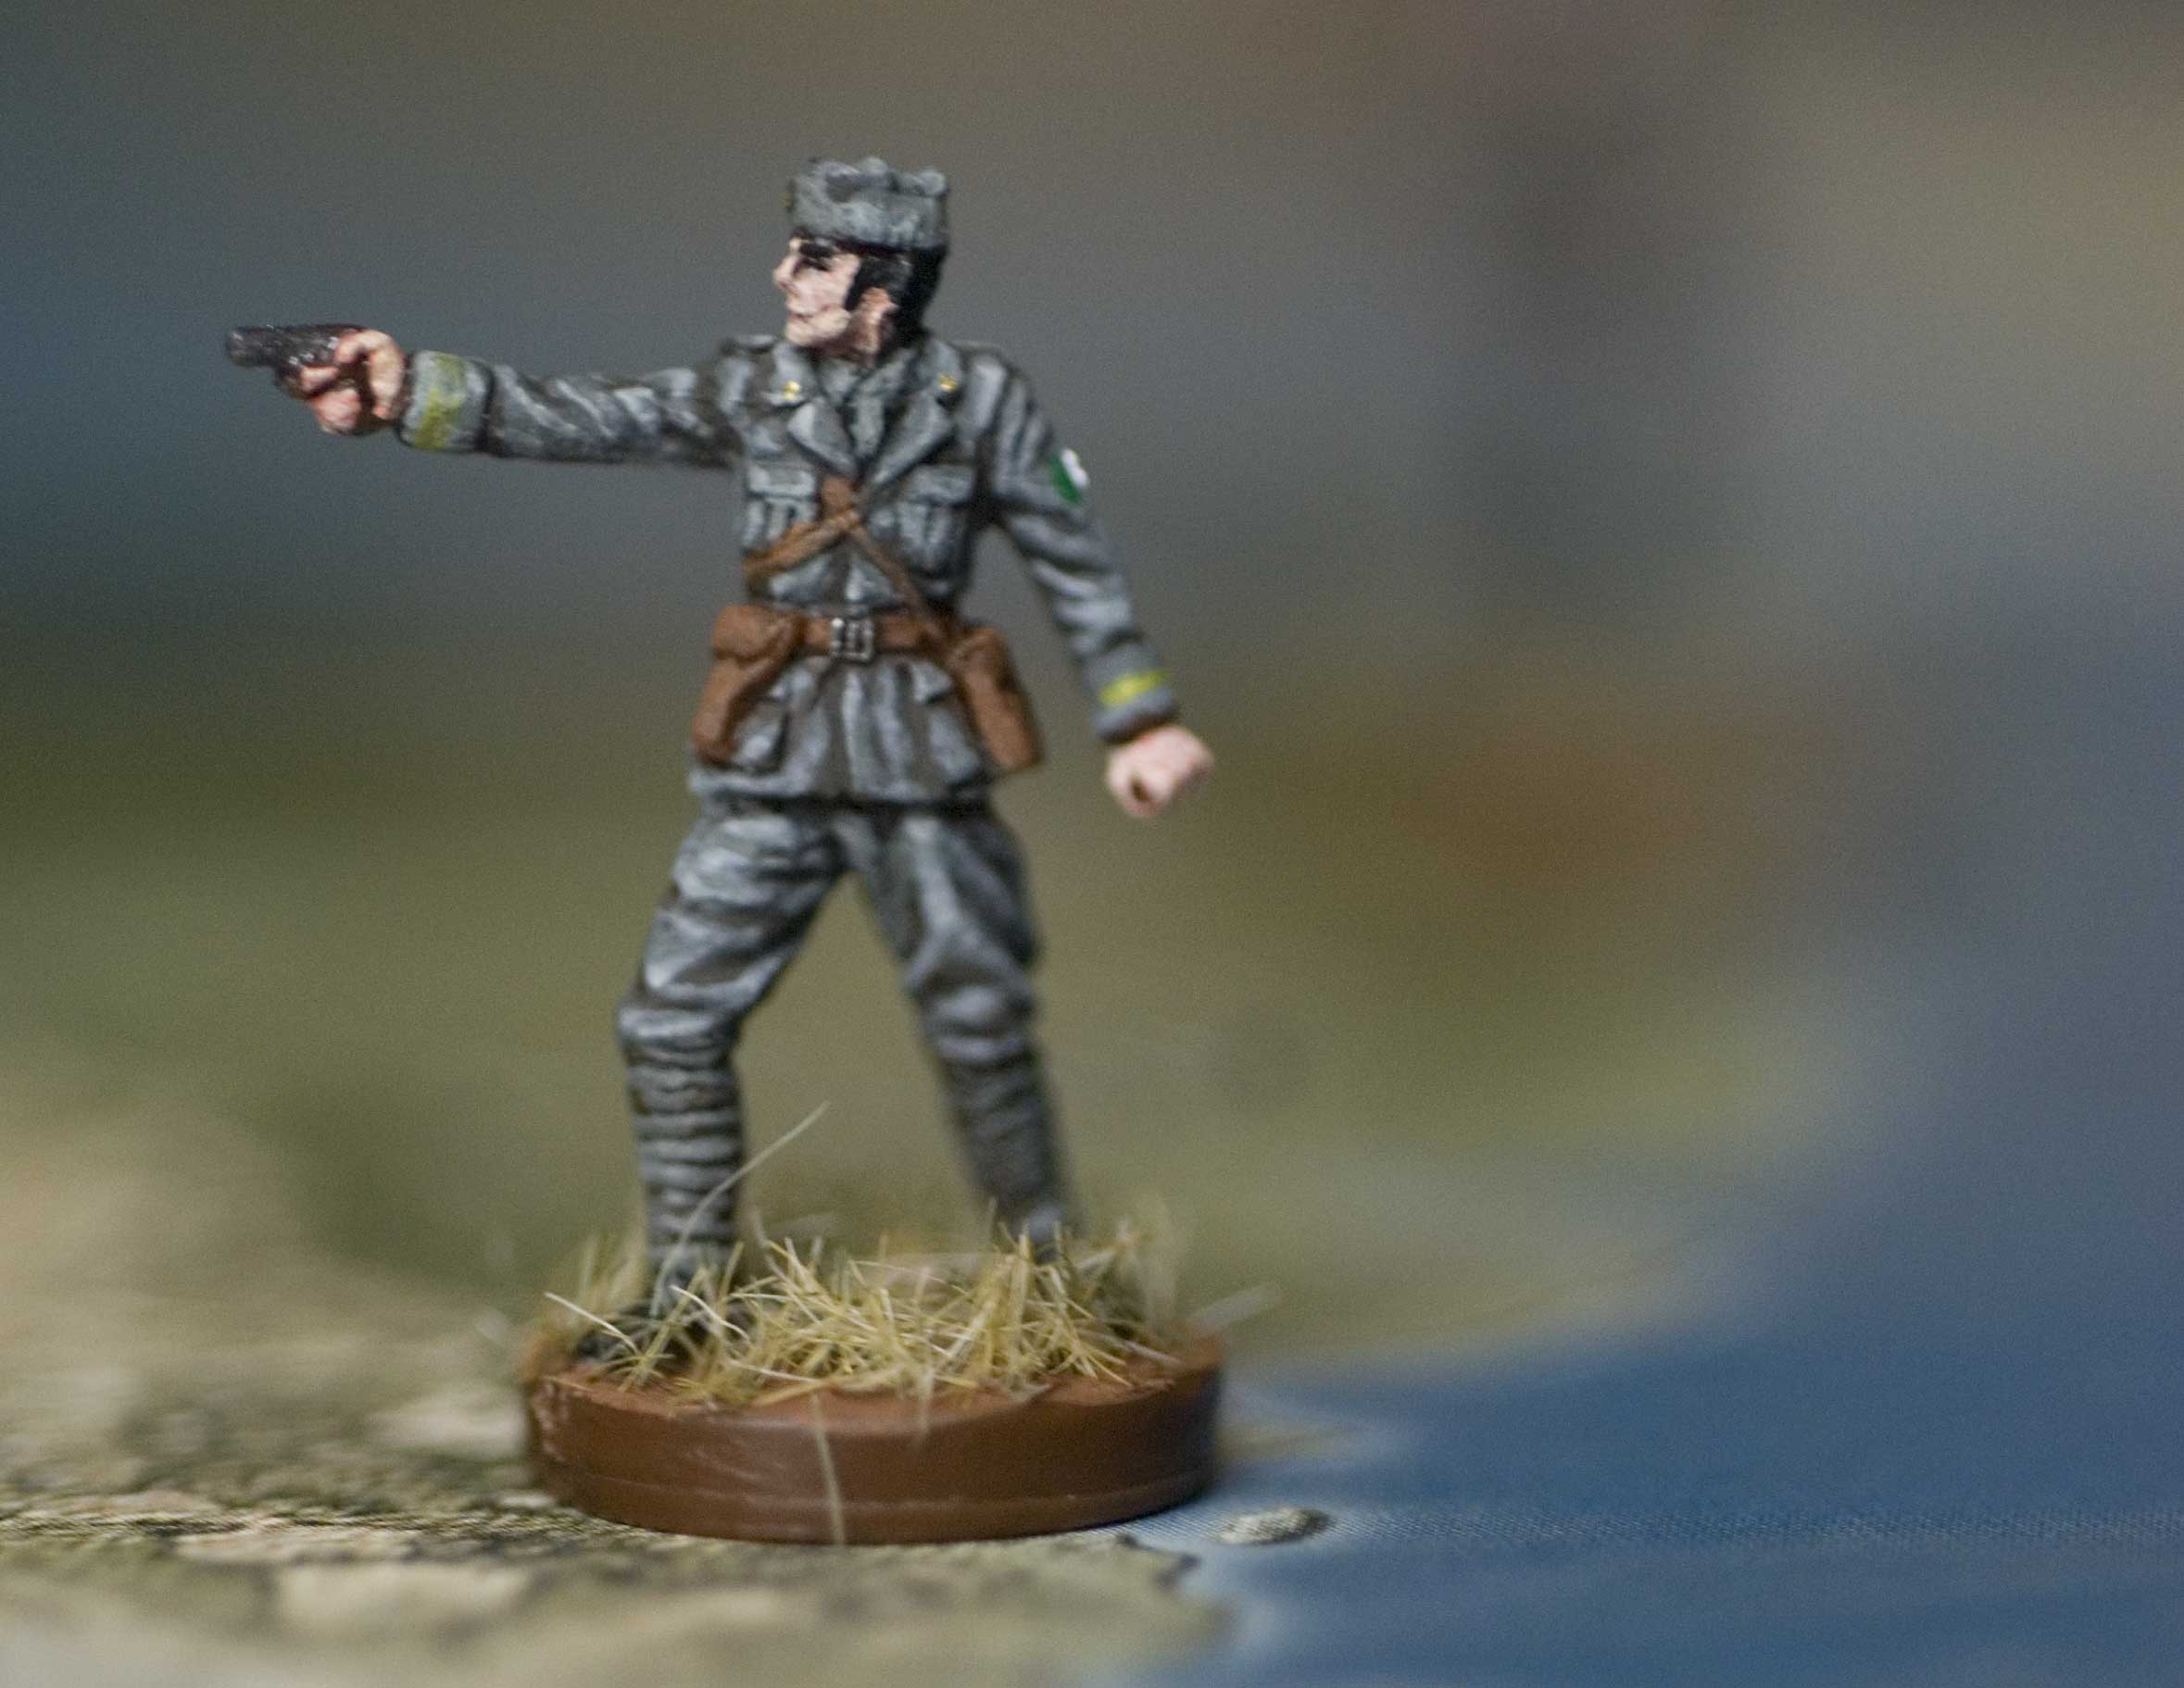
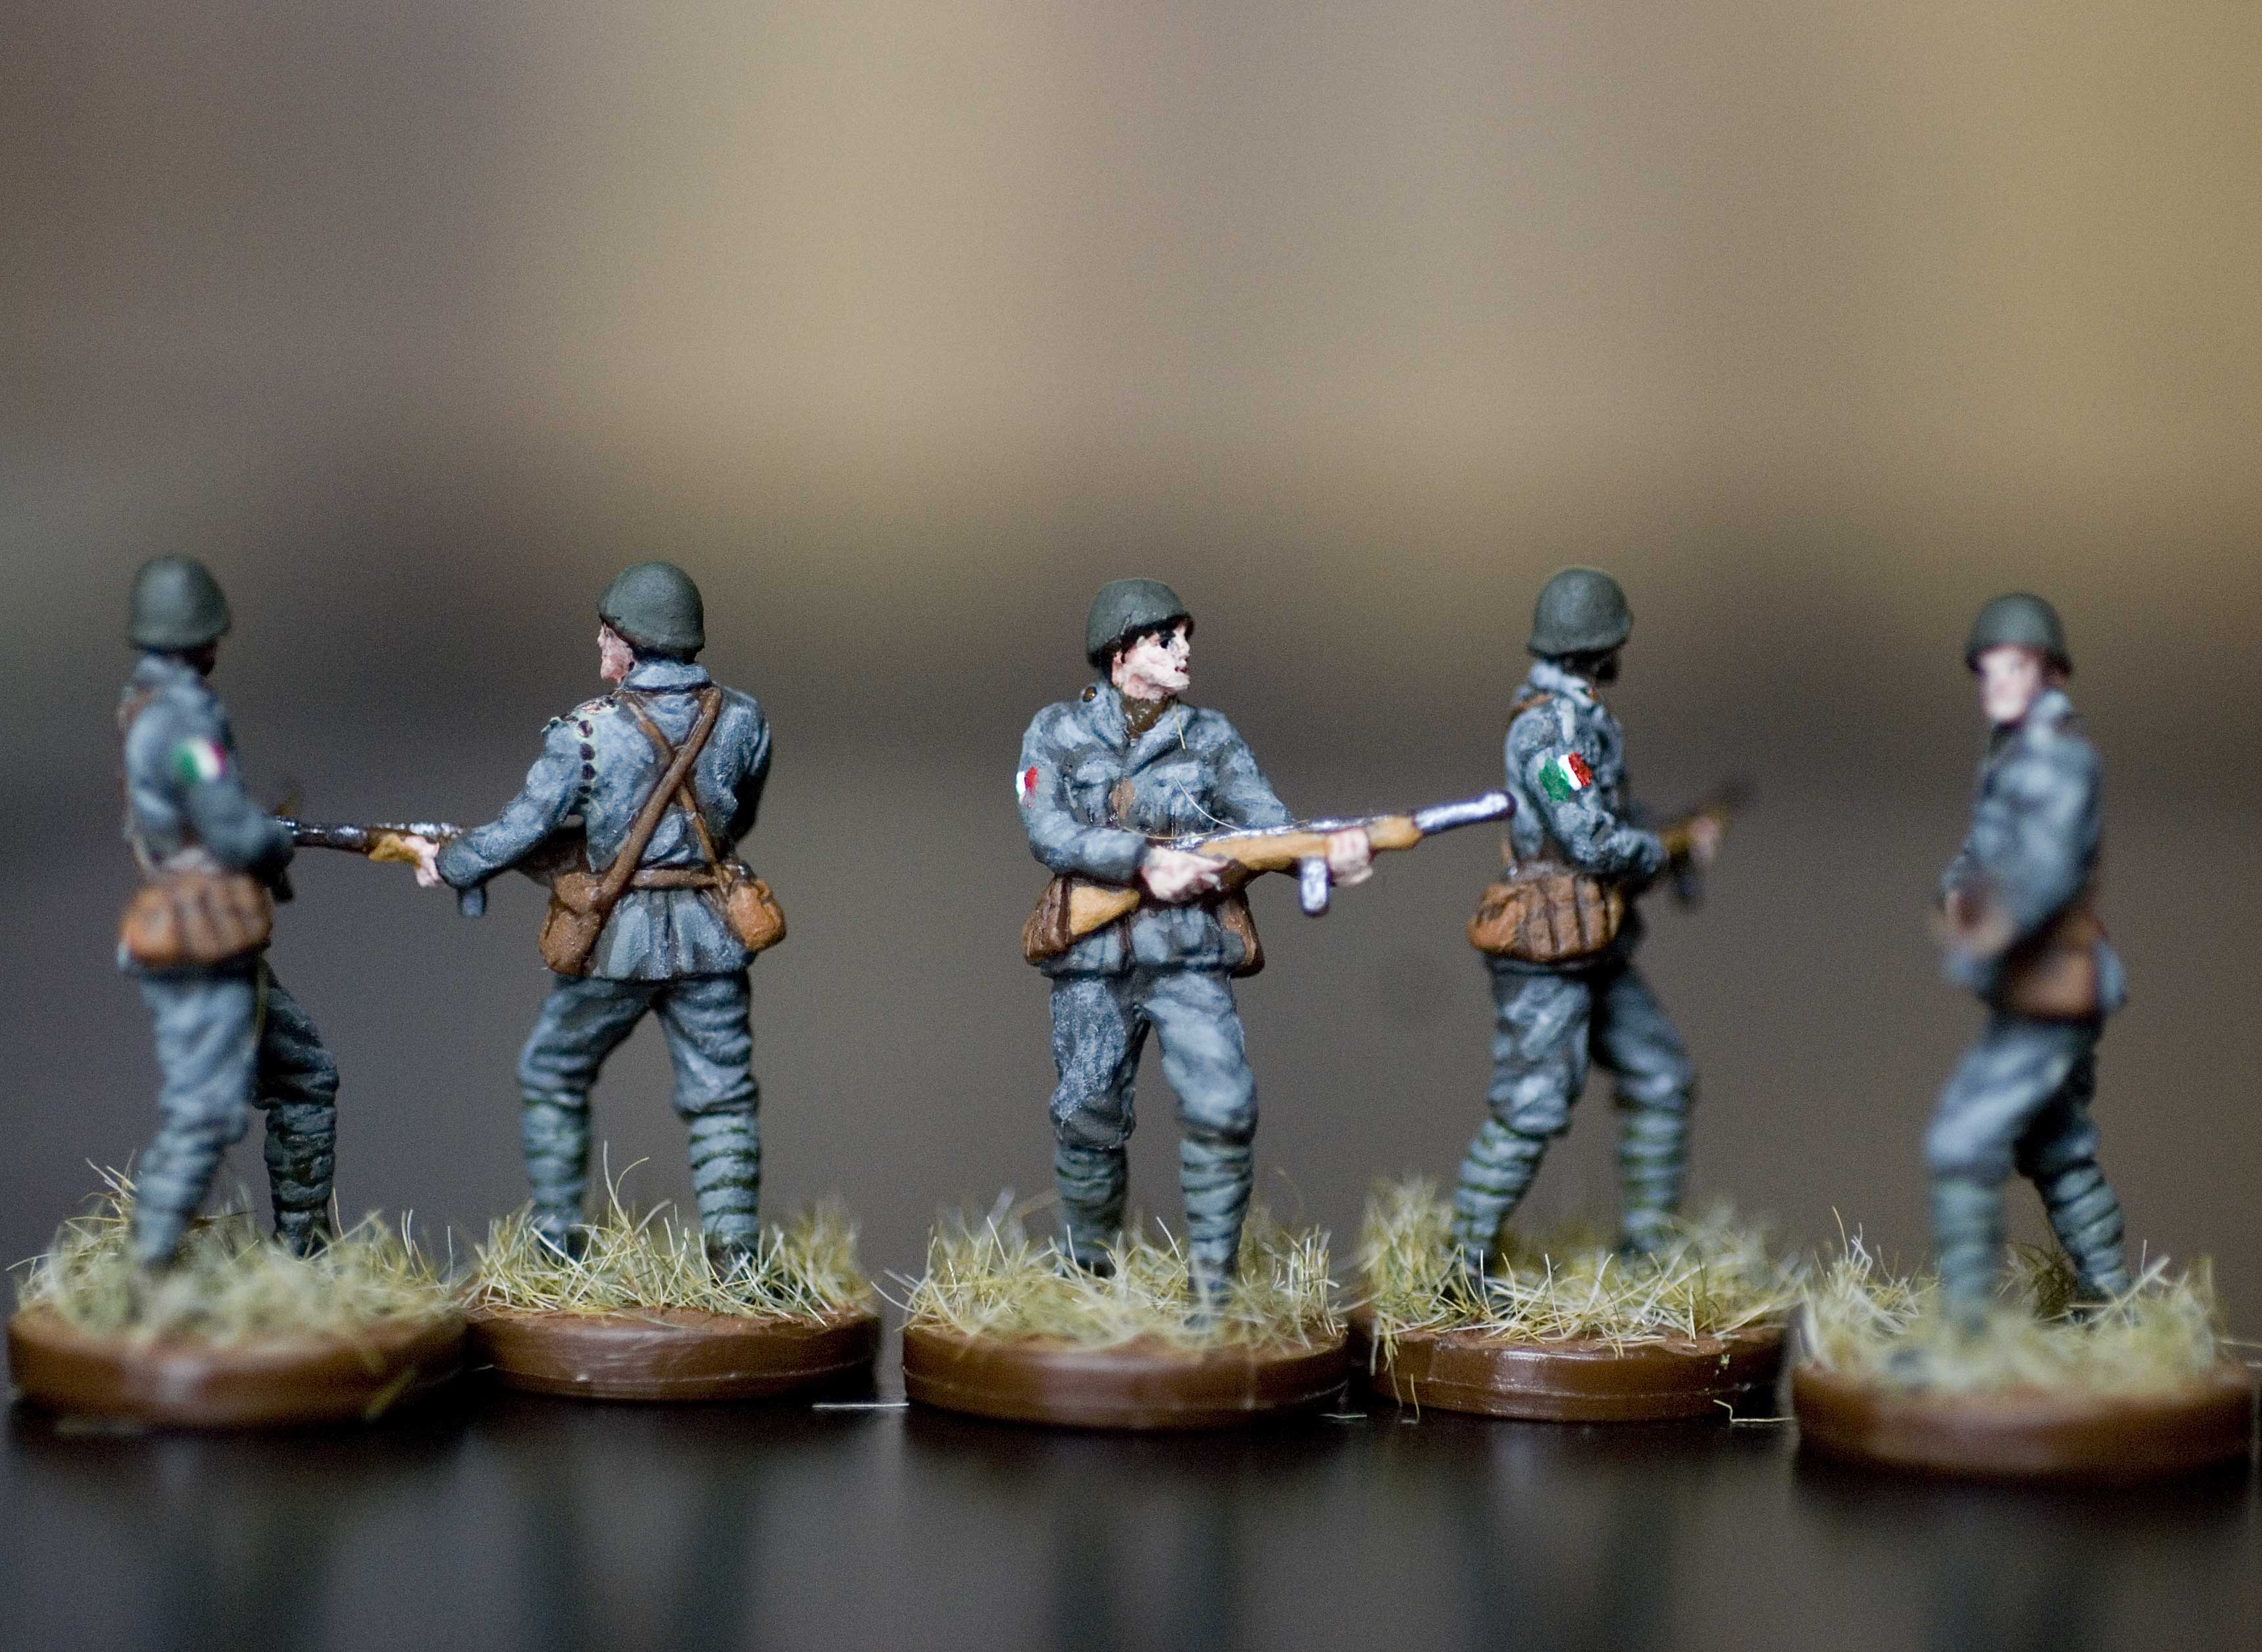
Seasons- White (Snow), Burgundy (Autumn), etc.Here are pics of my infantry. I painted them in 4 hours, which was actually remarkably fast, and they turned out to be my best work yet IMO.

Next, mix some of the tacky glue with a little bit of water… use your discretion. You need to stir it with a wooden skewer or your finger or something like that. You basically want spreadable glue. But not too much water!
Next, apply the glue to the base liberally. Here is a picture… sorry for the bad picture, but I don’t know how much I can show, besides the fact that the glue has beaded on the bristles, and it is still globby sort of.

Now, quickly spread the glue around the base liberally, then sprinkle the terrain all over the base; put a lot on, because some will fall off. If it’s too clumpy, crumble it between your fingers while you do it. OR, just as effectively, you can dip the piece into the terrain materials. See pics for examples.


Tap the pieces, brush off any excess around the base you don’t want, do some touch ups, and voila!!
Here are the final product. (The grey pieces I tried to paint, but they weren’t secure enough, so I couldn’t really get it to work… I’ll figure out a solution.)
The usual disclamier…things always look better in person, but here they are!
-
I must say sir, you have some fine minis there :-D Love the collars and your terrain turned out pretty cool. I’d suggest trying the terrain material labelled as ‘fine’ as well, has a dust - like appearance.
Interesting that you used a glue mix, how’s the finish look on that? Something that can’t truly be gleaned from photos online… I haven’t tried that because I was worried it would come out too shiny. No? Wondering because I just sprinkle directly on the base paint and it seems to hold.
Hope you don’t mind me posting these here, but I think images of the ‘threads’ kinda terrain exhibits better than my previous explanation.
-
WHoa. Those came out a little too big on the zoom. :roll: But you get the gist.
-
Post away! I am appreciative of the input.
Well, the glue dries perfectly clear. There is no problem with a shiny finish. I need to figure out something that holds better. If I used finer material, it would stick much better!
Haha yes, it did come out quite large! Interesting…I’ll have to try the fibers. It would look more realistic for fields, the Russian steppes, etc.
-
For those who want to see Viracocha’s pics, right click and open them in a new tab. its a good size then
-
Would anyone here have experience painting A&A pieces with ENAMEL paints? Seems like everyone is using acrylic, but I wanted to know if there were any issues foreseen in using enamel.
-
I use enamel paints on all of my miniatures……I have a YouTube video showcasing my figures if you would like to see them… It is in this same customization page under the topic name “Board Game Pieces”. I did not put as much detail into mine as many others do because of the fact that it takes soooo long! And to answer your question I seem to have ZERO issues with enamel paints. I have used them for a long time and will continue to do so. :)
Here - http://www.axisandallies.org/forums/index.php?topic=28438.0
Yeah, I started and I am using predominantly enamel paints also. They seem to be working better than the acrylics I use. They don’t dry quite as fast which is actually a good thing. Because of how little paint you use for models of this size, the acrylic paint dries very quickly and gums up your brush and the model. Haven’t had that issue with enamels, even if they sometimes look glossier than I want.
-
Spray or paint-on matte varnish will cure the gloss.
I usually gloss coat after the wash and then apply decals due to the smoother gloss coat.
I then dry brush and that’s it. Mostly I apply a coat of matte varnish to add another layer to protect the paint but enamels,
once dry, are unbelievably durable. Looking at old pictures of vehicles, you can still see an almost shiny surface on large flat spaces
and I discovered by accident that a matte coat is not necessarily a must. Might be different with ships where a satin finish is more desirable. -
(pours a pint and sits down with the rest of the painters)
Enamels? I’m not a fan - I like the blending and the ‘dry-fast’ of acrylics, and I find it easier to make the unit look like its seen some action. Though I do use some enamels for select things I want to remain shiny (guns sometimes). I (personally) like the dullness of acrylics, though I whole-heartedly agree that the enamels are far more durable (I have used them in the past).
If I worked with enamels I probably wouldn’t have the ‘fade out’ problem I get on occasion with acrylics, that is to say, after I give them a protective coat some colors/detail isn’t quite as fine. At times this is ok, a bonus blending more-or-less. But then there are other times when it mucks up the detail of the face for instance… I also like that when using enamels, the sheen of decals isn’t as visible. Huh… might have to dust off the enamels and give 'em a go.
-
(pours a pint and sits down with the rest of the painters)
Enamels? I’m not a fan - I like the blending and the ‘dry-fast’ of acrylics, and I find it easier to make the unit look like its seen some action. Though I do use some enamels for select things I want to remain shiny (guns sometimes). I (personally) like the dullness of acrylics, though I whole-heartedly agree that the enamels are far more durable (I have used them in the past).
If I worked with enamels I probably wouldn’t have the ‘fade out’ problem I get on occasion with acrylics, that is to say, after I give them a protective coat some colors/detail isn’t quite as fine. At times this is ok, a bonus blending more-or-less. But then there are other times when it mucks up the detail of the face for instance… I also like that when using enamels, the sheen of decals isn’t as visible. Huh… might have to dust off the enamels and give 'em a go.
Yeah, sounds like you talked yourself into it.
I once thought that all enamels had a gloss sheen to them, but that really is not the case. If they were all glossy I wouldn’t use them either. I have been using Testors and Model Master enamels for some time and quite like them. (Model Master I like quite a lot, especially since they have some great color blends for war painting… Testors is quite a bit more limited, but they work okay.)
Even with my airbrush I think I will like using enamels more, which I did not think would be the case before I started using it. Granted I am a beginner, but cleaning an airbrush full of acrylic paint is a major pain. The paint just dries so darn fast… even acrylic cleaner doesn’t help much, especially in the small space. With enamels on the other hand, just pour some thinner on and the stuff comes right off when you wipe. Acrylics dry while my airbrush or normal brush is still painting, which I find extremely annoying; not to mention the residue gets on the model and gunks up the surface.
-
That’s what I hate about acrylics. You end up wasting a lot that doesn’t reconstitute like enamels. It does have a much better flatness for a surface.
The advantage of blending with enamels can also be it’s downfall when you need color separation. Each coat has to dry enough so I would do large batches
so that by the time I came back around to the first figure, the coat is pretty much dry. The other advantage though with acrylics is you don’t need to worry about the fumes from the thinner. I’ve heard so many airbrush problems and the PITA setup cleanup process that I’ve only gotten the spray can type
airbrush and have not even used them after 2 years. Model masters spray cans and Krylon Camo sprays have been pretty good for me. I’ve not yet used
Krylon camo on such small pieces as A&A game pieces though. Paint and brushes are a whole investment in themselves. -
Yeah… ok, I’m convinced, I’ll give enamels another go. Though - I’m going to have to make a trip to the Hobby store because some of my primaries have dried up it looks… :-o
-
Well, the last post was about a month ago, but I’ll jump in on the conversation. I haven’t ever used enamels, but I like the sound of paints that you can reconstitute. I often end up wasting paint (granted, I’ve learned to conserve, so it’s not large quantities) if I need to get a color right and end up mixing a batch too large. However, I really like the quick dry of acrylics. Perhaps if I ever stumble on a large sum of money I’ll get me some enamels :lol:
In other news, I have some more pieces painted that I’ll post pics of. I have been absent from A&A.org for quite a long time for various reasons, but I’d like to get back to posting tutorials/sharing ideas and work! I’ll post my US Navy warships (I haven’t finished CVs, trannies, or subs), and my Russian inf, which I’m quite proud of. Also, I have some HBG Axis supplements (Hummels, trucks, arty, StuGs, etc) that are in a dark grey/black scheme, and a woodland camo, as well as 6 FW-190s. So, I’ll try to get pics up of those ASAP.
Anyone have any tips for taking photos? I can’t seem to get lighting or angles that make them look right; perhaps I need to use more natural light or a different camera.
-
Hey Spitfire - let’s see those pics!
Ok, so I tried enamels… nope. I’m sticking to acrylics. They just don’t dry fast enough for me, and despite the shiny coat that blends better with the decals, I prefer the acrylics. To each their own obviously, as I’ve seen some awesome enamel pieces on here.
-

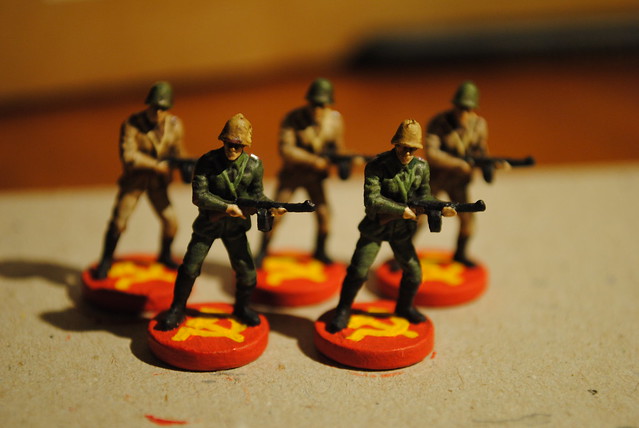
Here is the entire Russian infantry army. Well, just for the Europe1940, as I’m trying to finish that one first. (I’m pretty darn close too; well, relatively close :-D)
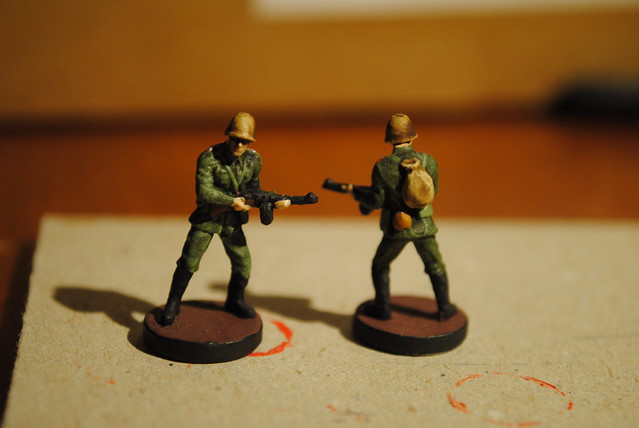
Forest Scheme

Drab Scheme
Here are what I call the “Nationalist Troops.” For each faction I try to paint a few inf with the roundels on the base, just for flair, maybe to put in the capitols or for house rules. And they’re fun to paint.
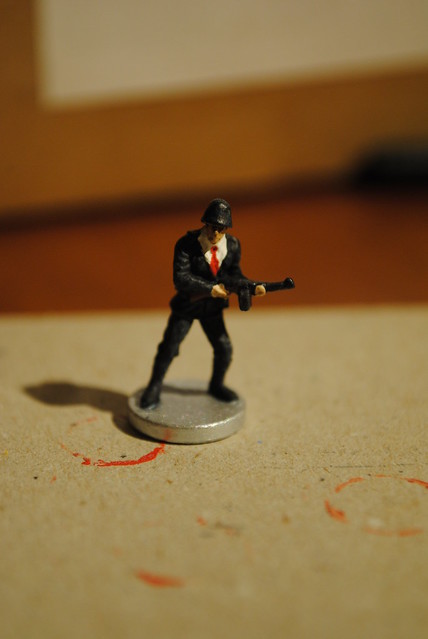
And every once in a while you have to let loose. The Russian jacket has two lines on it that make for a perfect tuxedo, and so I decided to make James Bond/Hitman/Spy, whoever you want him to be.Enjoy! I’ll put more pics up when I get the chance.
-
Fantastico! Those are awesome - those Soviets and ‘back’sacks’. eh eh eh - wonderful shading Spit. And ‘letting loose’ - love it! I have a few of those I’ve been meaning to post. Hey - are these coated yet? What do you use to coat em? I go for the basic clear coat - but notice I lose a little detail sometimes.
Suggested Topics

