


Hey, I love the axis and allies miniatures but can never find people to play them with me. If any of you know how to play the miniatures or even better, the war at sea miniatures on line, and would be willing to teach me and play a few games, that would be great! hope to find someone to play with.
AAM Flashback - Mot vs Cobalt - Luksusowa
-
I figured it would be worthwhile to post up some past AAM games that were wiped from this forum a few years ago when the spammers nuled it.
This game was a match using the 1939 invasion of Poland scenario (“Luksusowa”) described here:
http://www.axisandallies.org/forums/index.php?topic=11831.0
Game map to follow.
-
I was asked how you pass maps back and forth, an this is how you play-by-forum with MapView. You simply attach the map using the “Additional Options…” link right below the windows you type you Reply into, like this!
-
The other player (or any spectators) can then tap on the link to view or continue play as long as they also have MapView (http://motcreations.com/mv_overview.html) installed and have downloaded the game modules ( see here for AAM modules http://www.axisandallies.org/forums/index.php?topic=10782.0).
The game progress is viewable in the row of tabs along the bottom. Â All the way to the right is the Initial Setup, and then each player adds a tab containing their turn, creating a kind of flip-book that holds the history for the whole game.
I think what I will do is each day is post the game one turn at a time as an image as well to illustrate the way a AAM game flows in play-by-post.
Mot
-
Initial Steup
In most games you’d use the built-in forum dice roller to select who goes first, but in this case the setup is defined by the scenario. This image is the first “tab” or page in the game. In it, both armies are dropped onto the map awaiting deployment.

-
Obstacle Deploy
If obstacles are used then they are deployed next. As you can see, it takes several map exchanges to get a game started due to taking turns during unit placements.

-
Germany Deploy A
As noted before, deployment order for this scenario has Germany deply half thier units, then Poland, then Germany does a second deployment to emulate an element of surprise.

-
Poland Deploy

-
Germany Deploy B

-
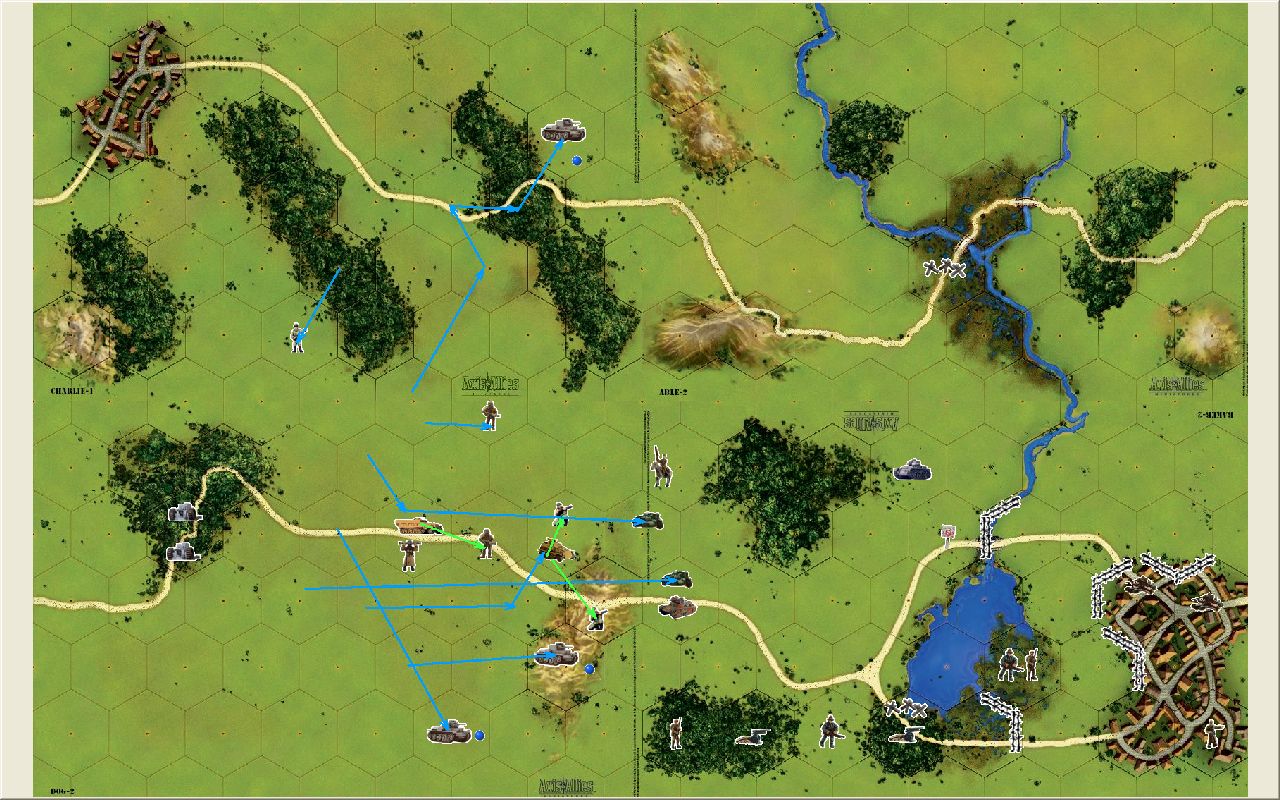
Germany Move 1
Making good use of the transports to deploy troops and position my spotter for some indirect fire!
I used two tabs for the move phase just to make it clear the order I was moving a few things.

-
Poland Move 1
The Poles fall back in the face of my fast-advancing Germans, except for the Renault moving north west for a good flanking position. The 7Tpdw did not move due to threat of defensive fire from the BMW I rushed into its hex.

-
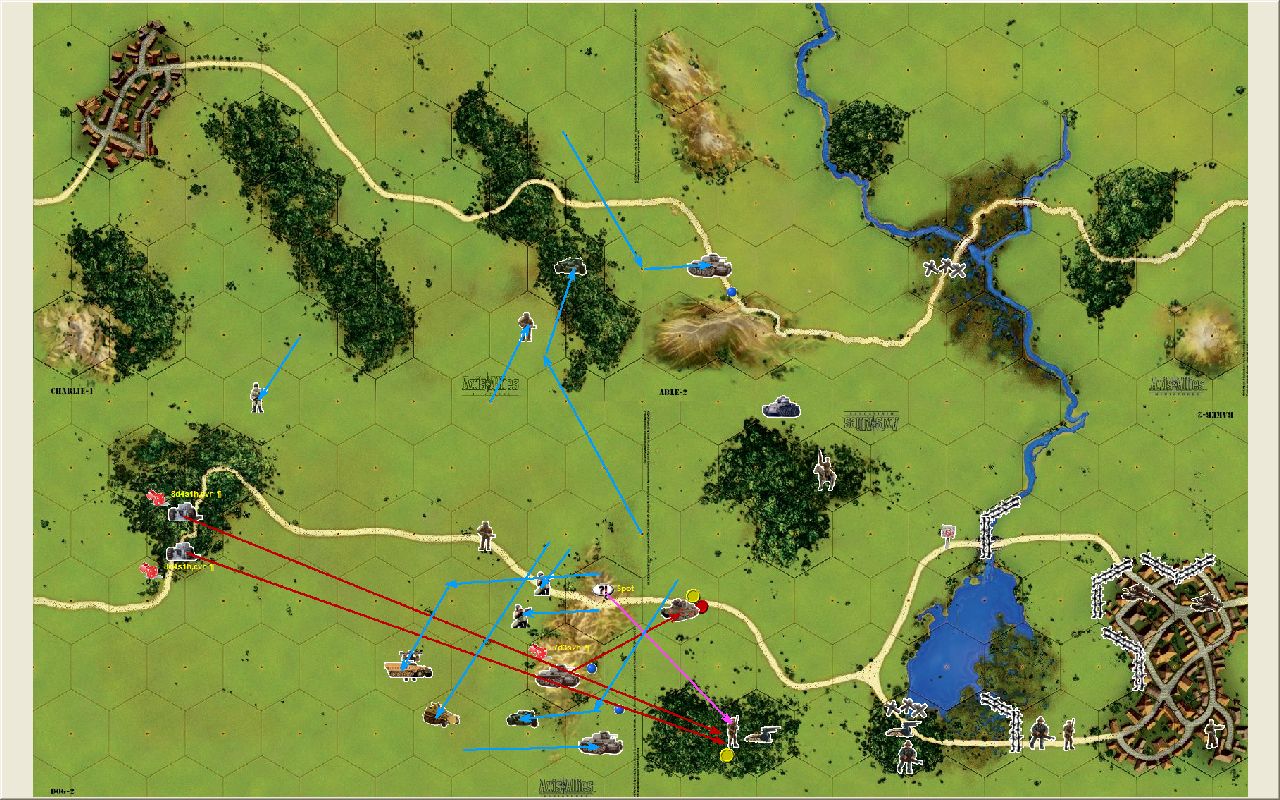
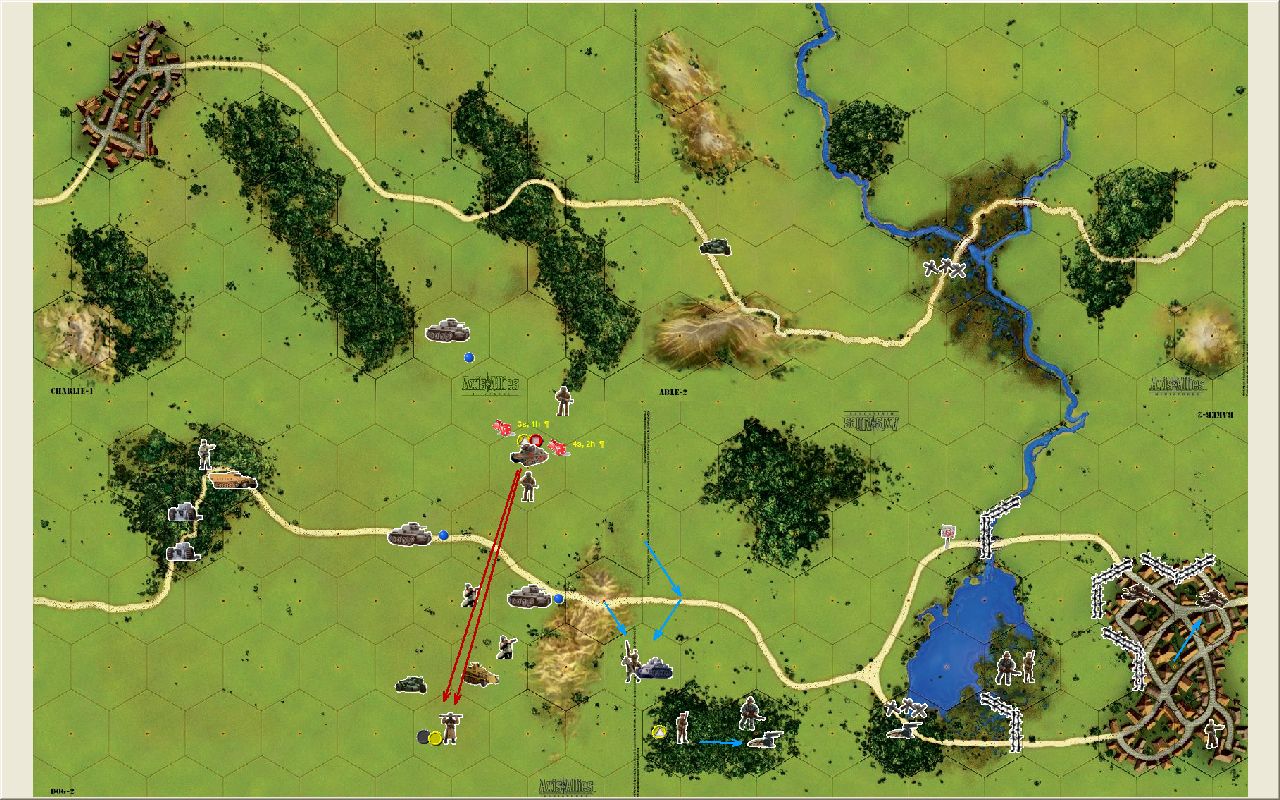
Germany Attack 1
The typical way to perform a turn in this format is to move the units on the map, annotating the moves with the blue arrows. The use of the arrows usually means you do not need to use text to describe your move. For attacking, you draw your targeting arrow and then use the dice roller here to resolve the attack. By convention, we then copy-and-paste the result into a Dice icon on the map so that info is captured in the game file. You cannot see it well in my screen snaps because they are smaller than what you’d see using the MapView tool, but the dice results are right on the map.
To recap this turn, my spotter directed two rounds of fire onto a Polish troop in the woods before high-tailing it on the back of the truck out of danger, my Kzpfw 38t fired on the polish machine gun tank that my BMW had pinned, and I shifted another BMW and Kzpfw 38t north to flank the Polish Renault that was attempting to flank me. Good thing they are so slow :)
-
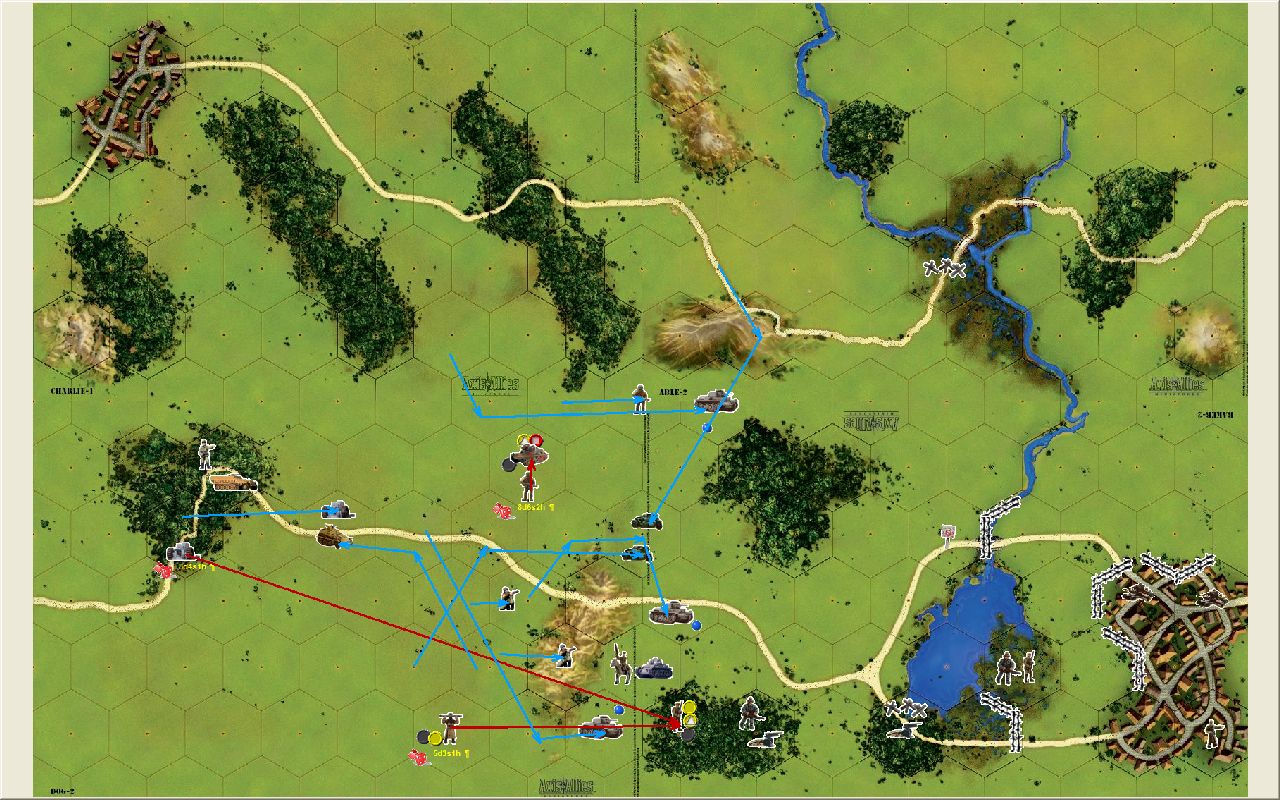
Poland Attack 1
The Poles make some great strategic moves:
The 7TPdw with the face down disrupt/damage moves forward within range of the German infantry that were advancing out of LOS behind the hills. Â Smart move knowing the 7TPdw cannot effectively combat the German armor and that it will not be able to move next round. Â
Likewise, a Polish Calvarymen rushes to that hill line to prevent the German Infantry from gaining to cover offered there and slowing their advance.
The Poles move up one of their anti-tank guns to near point blank range on the armor on the south side of that hill line.
The Renault moves forward as well, likely trying to go for broke against the pair of 7.5cm guns that are the center of the German offinsive strategy.
One of the Bofors starts firing on German armor, but at this range its going to take a lucky shot.
-
Casualty 1
The Casualty phase is when the face-down markers turn face up and the final state of the map for turn one is complete.

-
Poland Move 2
At this point, initiative would be rolled. Poland is moving first.
Poland is continuing to jam the middle, moving up a machine gunner and the Renault. It is quite a showdown for who will control that important ridgeline.

-
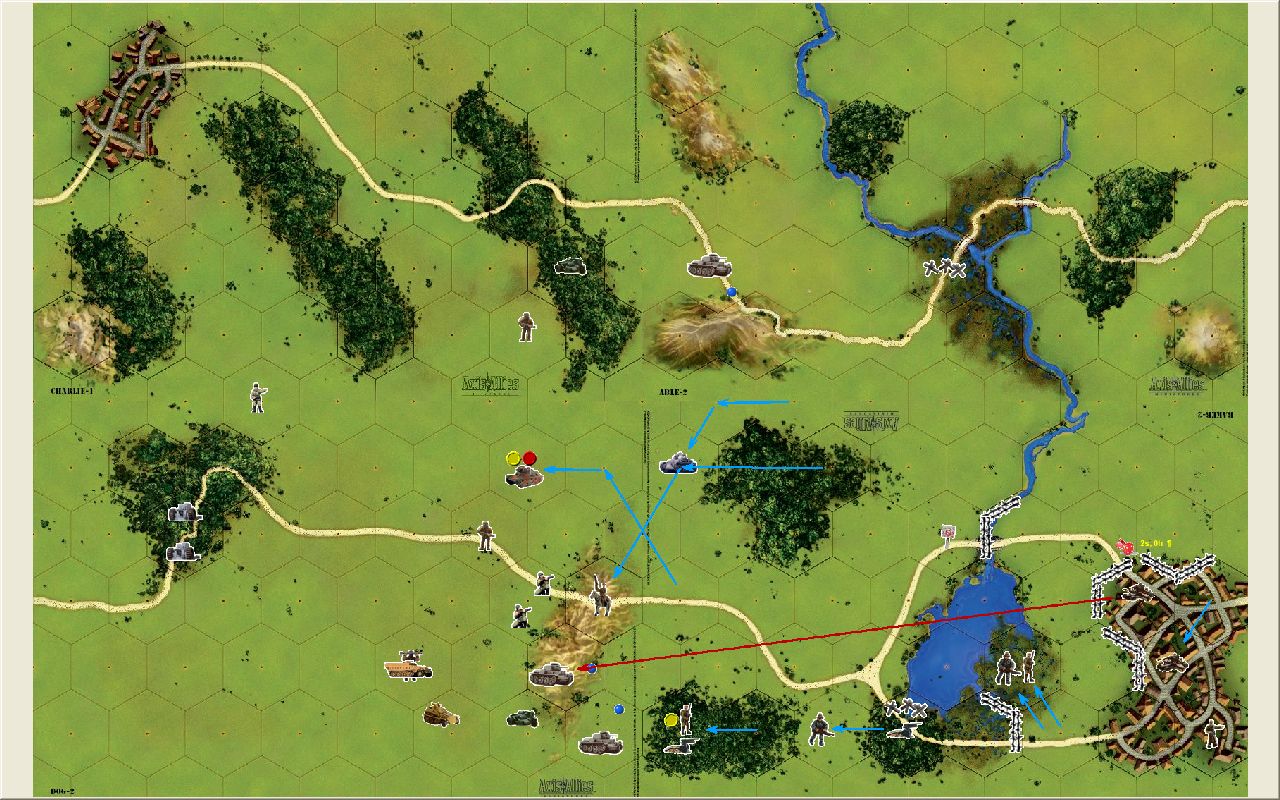
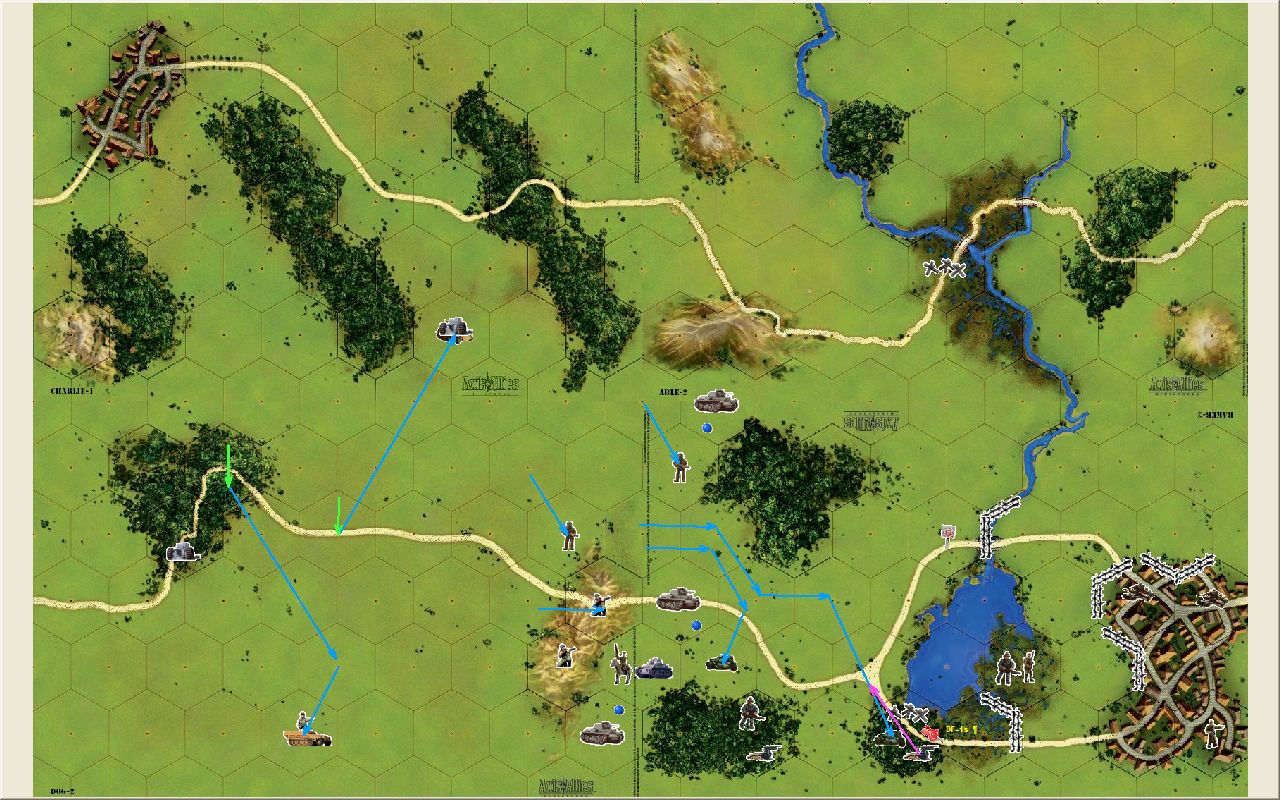
Germany Move 2
Germany blinks first, not willing to charge the Polish Cavalry holding the ridge with their fierce Hand to Hand rating. The German armor all fall back: in the south away from the ATG, in the north to reenforce the units behind the ridge, and even the ridge is relinquished in the face of the Bofors and ATG. Also of interest, the german spotter has been deployed with an eye-line to that polish ATG.
Note two map tabs were used to due to sequence related movements, the transport moving after unloading the spotter.

-
Poland Attack 2
Having caused Germany to react to the pressure Poland placed on the ridge line, and not liking the prospect of the number of unit that could concentrate fire on their, Poland now fades back behind the ridge thus face from fire. The tactic slowed Germany down by a turn, so well played.
The damaged 7Ptdw could not retreat so instead finds the german spotter in the open and destroys him. It was a huge mistake by Germany to let this key unit be taken out so early.
-
Germany Attack 2
In an amazing display of speed, Germany takes advantage of going last and rushes forward. The Renault is trapped by flanking panzers.
The 7Ptdw is destroyed by an SS-Stormtrooper, and the disrupted Polish Infantryman is finished off in an artillery barage called in by the dying spotter.
-
Casualty Phase 2
Next round is sure to see armour battles. The Renault is tough, but is out-numbered 3 to 1.

-
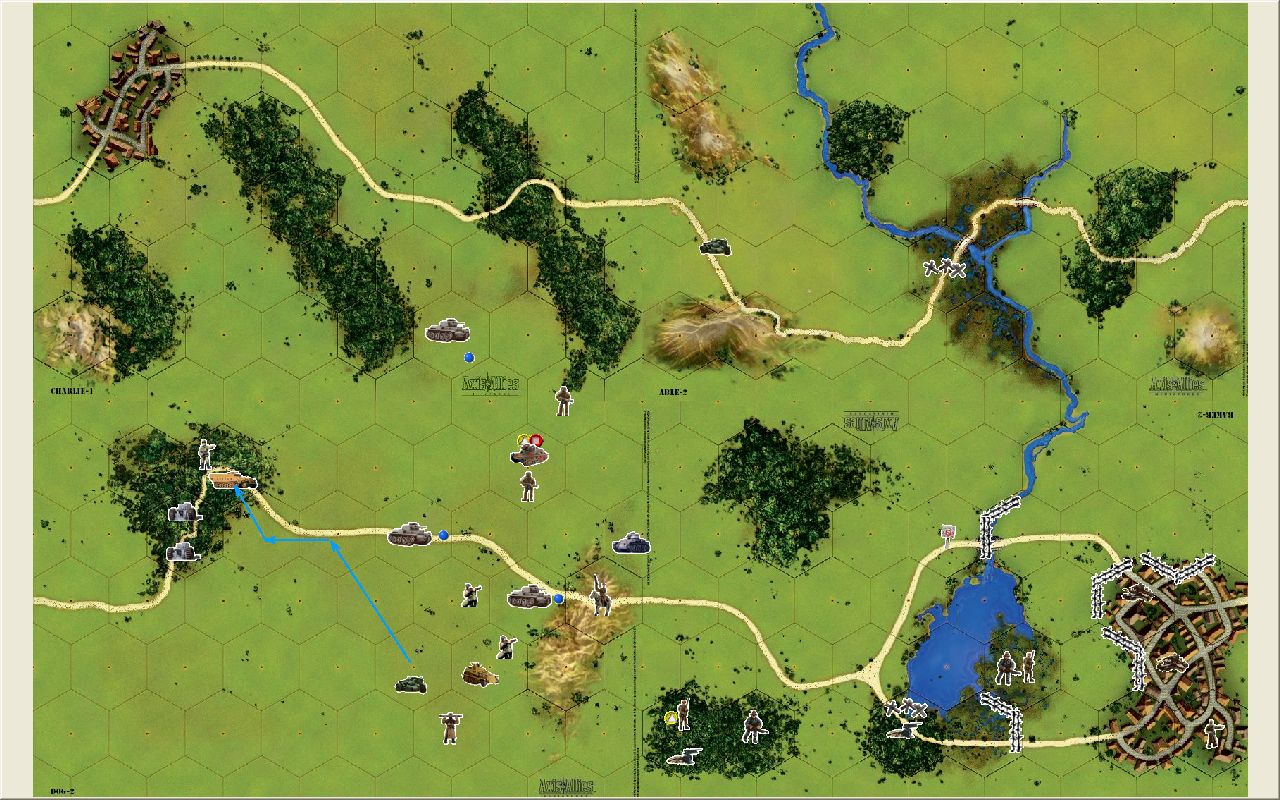
Germany Move 3
Moving last in turn 2, followed by moving first in turn 3 gives Germany the opportunity for a quick surge.
German Mauseres and storn troopers advance, and Germany now holds the ridge line.
German flanks the Polish Cavalry unit that had been escorting the now-trapped Renault with a BMW unit to the rear and Polish Mausers on the ridge.
Seeing an opportunity, a second BMW unit races into the same hex as a lone Polish anti-tank gun holding the wooded southern road. It attempts defensive fire to ward off the movement but is unsuccessful.
An 7cm gun is on the move, being transported north west to a better vantage point.
The German armour have the Renault surrounded and hold their ground to prevent it from escaping.
-
Poland Move 3
Several Polish units are pinned, the the remainder hold their positions in cover for the battle that is bound to ensue.

Suggested Topics

