


@the-captain they are water slide decals.
Flags, Flight Stands, and Magnets
-
Hello All! Here is a way you can add some fun and immersion to your game!
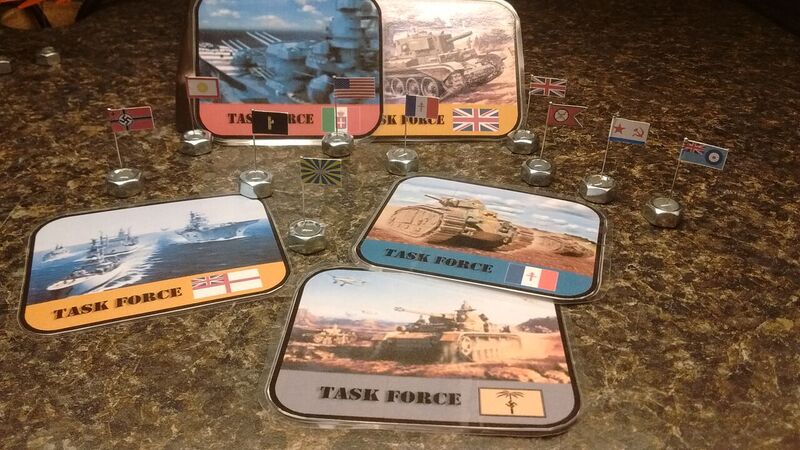
Adding flags to your game is a lot of fun. You can use them just for immersion or as task force markers to save space on the board.
Flags
Materials you will need:
Printable flags (I used HBG’s, but Siredblood has some as well that I plan to try out - both are FREE!)
http://www.historicalboardgaming.com/Task-Force-Markers-Free-Download_p_700.html
https://www.youtube.com/watch?v=Fwm09tPkZSk (click the video details and more information for link)
Adhesive medium (This is what you print your flags on. I used postage labels, but you could use decal paper)
Hot Glue and a Hot Glue Gun
Hard, Smooth Surface (something you can scrape dried hot glue off of)
Regular Sewing Pins (I use 33mm long pins, minimum height recommendation is 28mm, you will see why when you read Flight Stands)
Nuts (I used 5/16" because it “clicked” into the OOB A&A chips)1. Fill the nut with hot glue and stick in the sewing pin in the center point first all the way to the bottom, while the glue is still hot. Adjust and hold the pin to be as perpendicular to the “ground” as possible and hold until the glue sets.

2. Attach printed flag
3. Enjoy
Flight Stands
When I first discovered FMG’s flight stands, I thought that they were the most amazing customization for A&A ever. But I didn’t have the money to buy them. Now that I have a small budget for them……they are no longer available. So, back to good old DIY. I tried to keep the same scale, but had to increase the flight stand height due to supply availability (FMG flight stands are 28mm tall). You could paint these or leave them as is if you like the clean cut, metal look. The big thing with these flight stands are that they are not permanently attached to the aircraft. I did not want to glue my planes to stands. What if I wanted them on carriers? Or on the ground? The whole idea behind this design is for the aircraft to be solidly mounted on the stand, but removable. The answer came in the form of magnets.Materials you will need:
Flag Poles (From section above, without the flag. Make sure that the pin height is here you want it.)
Rare Earth Magnets (2mmx1mm)
http://www.ebay.com/itm/200pcs-N50-2mmX1mm-Neodymium-Disc-Mini-Strong-Rare-Earth-Small-Fridge-Magnets-/381876261625?var=&hash=item58e99952f9:m:mRJVdhZPGc3TLZ7Uzu5j63g
Epoxy
Tools and Props as needed.Take your flag pole and glue a magnet on the head of the pin. You want to make sure that the magnet is as level as possible. I used a piece of angle iron and a strip of magnetic tape to prop up the stands for this purpose.

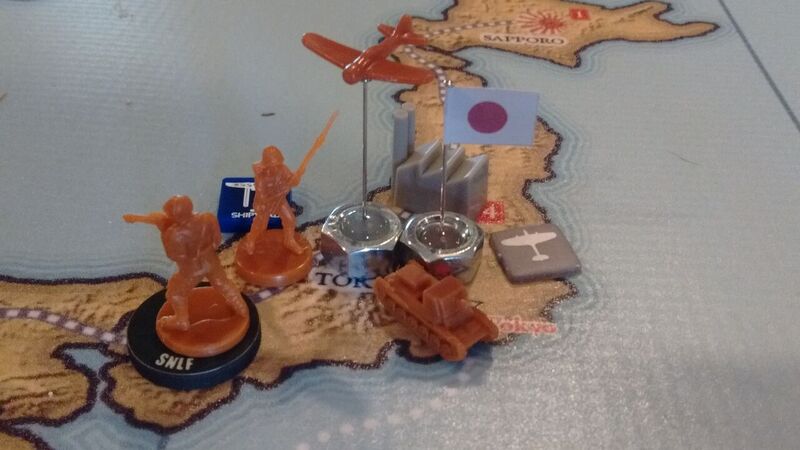
Your Flight Stand is complete. Now for the aircraft. It is very important that all of your magnets are oriented the same way for all stands, aircraft, and carriers. Otherwise, you will have your aircraft ZOOM away from their location at MACH 1!
Use DK’s technique to attach magnets to the aircraft and carriers. I used the 2mmx1mm magnets on all of the planes WITHOUT fixed landing gear. Try to keep the magnets level to the “ground” when gluing them in if you want your aircraft to fly straight and level. I accidentally and purposefully messed up on a couple here and there to give them an “in action” look.
DK’s Video:
http://www.axisandallies.org/forums/index.php?topic=39873.0
I didn’t want to cut off the landing gear of the planes that had them, just so they would stick to magnetized carriers. I prefer a more historic look. If the aircraft historically had fixed landing gear, then they should in the game. The fix? Use bigger magnets! I used 3mmx1mm magnets on ALL carriers and aircraft with fixed landing gear and it seems to work pretty well. The one eception has been HBG’s Swordfish. The piece is too small for a 3mm magnet so I had to use a 2mm. It still works though. You can tell it is on the very edge of the effective magnetic field.

For anyone that has doubts about the strength of these magnets, take it from me, they WORK!

Note on the carriers. The Australian and Italian OOB carriers are thinner than the others, so be careful when drilling (with a drill press). For the non-hollow carriers (OOB and HBG) denting the bottom for the magnet (as in DK’s video) is not enough. You will need to drill deeper. I made a sharpie mark on the drill bit and drilled to or just past the mark depending of the piece. You want at about a magnet’s thickness between the carrier deck and the bottom of the hole you are drilling. Be carefule not to drill through!
I have been using Loctite Super Glue Gel to glue the magnets to the pieces. The epoxy kept drying up on me while I was using it (I work on large batches of pieces at a time). Be sure to wipe off ALL excess. We will see how well it holds up, no complaints so far. However, use EPOXY to hold the magnet to the flight stand.Soon everything will be magnetized along the same system.

Don’t hesitate to ask if you have any questions.
-
A good do it yourself remedy since the market is super dry with them right now
-
A good do it yourself remedy since the market is super dry with them right now
And who knows when more will ever become available again.
Suggested Topics

