Hi folks, I decided to start a fresh thread on this topic after seeing this one: http://www.axisandallies.org/forums/index.php?topic=16418.0 . Primarily, the solution in that thread points to another site, so I though you might like a local alternative.
If it’s an Avalon Hill game that I love (started with Advanced Civ), then I’ll want compartment storage for all the many parts. I never did care for sifting through game pieces as though it was a box of Legos. That desire had never been more evident than when I opened Pacific1940. I could tell right away from the sheer number of different types of pieces that I wouldn’t be able to buy a bunch of plastic organizer boxes and have them fit in the game box without raising the lid height.
So I knew I would have to compartmentalize the existing boxes. But would there be enough room to stick your fingers in all the little compartments, and what would I use for the dividing material? It couldnt be too thin because it needed to withstand frequent use. It couldnt be too thick because that would use up too much room.
To look at me, one could tell I was truely pained as I stared at the predicament. And what nubile comments would my friends make as they realized I had done nothing to resolve this tired recurring dilemma? My girlfriend apparently felt enough empathy for me that she kept her eyes out when she went craft shopping.
As such, she found herself in WallyMart the next day, eyeing a 24x36 sheet of black foamboard. Not only was it black on both sides, but the interior foam was dyed the same color, and it was only $3! She picked it up without hesitation, texted me that she had a surprise, and then dropped it off later that night before heading out for a babysitting gig.
When I saw it in the living room, I knew it was perfect. I could cut board strips with scissored knocks and then Elmers glue them down into the boxes. It would be detail work, but if done slowly with lots of rechecking, I would have not only the best, but the cheapest compartment solution of all my games. I set about the deed in the following order…
-
Measure the lengthwise strip and cut a test piece. The test piece (as all pieces) was cut with a radial arm saw for perfection. Ahhhh, what cant the mighty radial arm saw do?
-
Once I had cut and trimmed the lengthwise piece (of which I would need 10), I did the same for the perpendicular pieces (of which I would need 20). I cut a few extra for each for the inevitable mistakes.
-
I then used scissors to cut knocks into the lengthwise and perpendicular pieces as my “molds”, if you will. The knocks were half cuts about the width of the foamboard so that they would connect together like lincoln logs.
-
Once I was satisfied with the placement of the knocks, I used the molds to cut all the remaining pieces.
-
I then fitted all the gridworks together and placed them in their boxes to ensure a clean fit. Only a light amount of trimming was needed.
-
For USA, UK, Japan and ANZAC, I cut off a piece to make room for the infantry.
-
For China, since they have only infantry, I cut a few extra pieces off for a special gridwork to contain all the nonCountry specific parts that could be used by all the players.
-
I then used Elmers glue to line the bottom of the gridworks and seated them firmly in place.
-
Then I dripped some additional Elmers down the sides of the vertical edges (around the perimeter).
-
I then took the 5 boxes and then lined them up against each other on my work bench, with bricks on either side to mash them together (to properly set the vertical glue).
-
I also set a weighty object on top of each gridwork to properly set the base glue (everything needs to be edge to edge to avoid pieces sliding under the walling).
After that, it was a matter of waiting 24 hours. Elmers is very strong and dries clear, but it takes a long time to set. Below are some pics of the finished products. I apologize for not having pics of the work in progress. I did not realize at the time that other folks might be interested. If you’re curious, I’d say it took about 4 to 5 hours at the snails pace I was working. There wasnt a whole lot of the foamboard left (about a foot square), but that’s sufficient wiggle room for additional blunders. When all was said and done, I had no trouble reaching in and selecting pieces as needed.
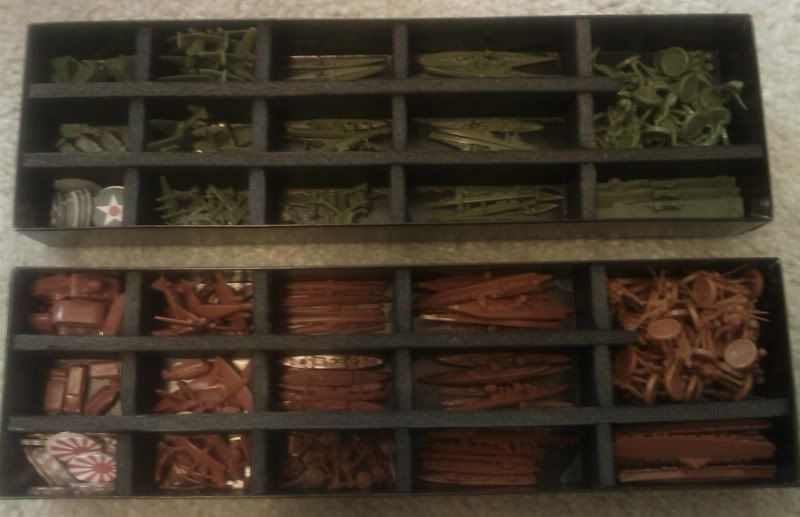
Here is Japan and the USA. Japan of course has the most pieces, but everything fit without difficulty, with the exception of the US bombers. I had to do a little wiggling to get them all in. I had the same problem with the 2004 Edition A & A. The US planes are always bigger.

ANZAC and the UK. You’ll notice there’s slightly more room in the middle compartments than in the left two sets of compartments. This is true of all the boxes because I used a mold to cut them. I did not actually intend to do this. It was accidental, but it turned out to be necessary!
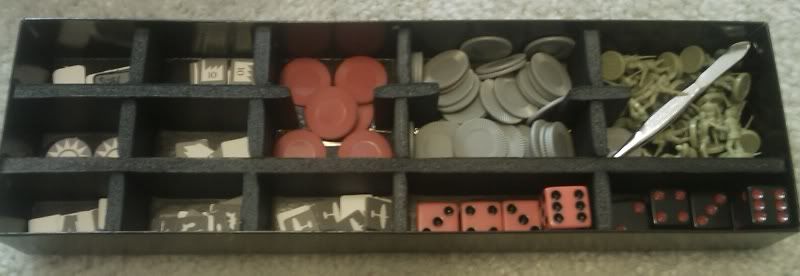
I knew China would be my “everything box” because of the available space. I added a pair of tweezers for fear that it might be difficult to get some of those cardboard naval bases and the like out in a convenient fashion. Note that I haven’t needed the tweezers, but I dont want to have to even think about the concern.
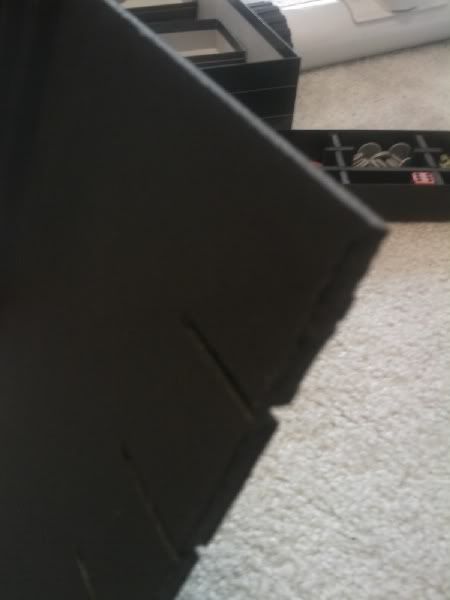
Here’s a shot of the remnant of the foamboard. It’s about a quarter inch thick and has little flexibility. You can see I used the radial to slice a series of strips before I cut them off to reduce individual measuring. I realize radial arm saws are a rarity in households, so you’d probably have to use scissors, but I would not recommend exacto knives. They tend to stray off course. And once they have, it’s hard to get them back on track without seriously messing up the edge.


