
Written and photographed by Spitfire38 from Axis and Allies.org on April 1, 2012. Edited by Rorschach of I Will Never Grow Up Gaming
Hello everyone!
There are a lot of great painted pieces out there, but I have not stumbled upon a single thread that includes a tutorial or explanation of HOW to paint your Axis and Allies game pieces. Hopefully this can be a resource for anyone interested in painting their own sets or for anyone who has any questions regarding painting.
I have been painting since I got my first Axis and Allies 1942 set two years ago; I finished that and have moved onto my Axis and Allies 1940 Global set.
My work has progressed from my first crude brown and maroon T-34s to my newly finished AVG Flying Tiger with shark camo and Chinese roundels. I would call myself experienced, but not an expert or professional. I find time between school and my job to paint, so it gets done based on how much time I have.
I’d like to start with the tools and paints used;
PAINTS AND TOOLS
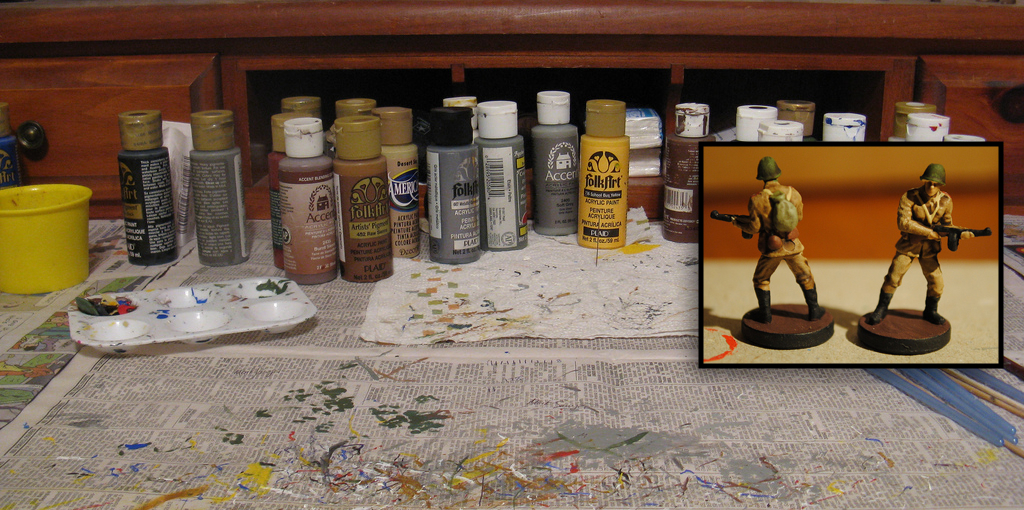
I use acrylic paints (oils would be a nightmare, and I don’t think they would work well). You can get them at your local Hobby Lobby or Michaels (or any arts and crafts store, or even the Dollar Store) for about $.90 to $1.30, depending on which brand you use and where you purchase it.
You will need a good variety of paints…probably anywhere from 15-30. Here is a sampling of some of the paints I use.

As you can see, I don’t stick to one brand- if you’re willing to shell out the money, I’ve heard Vallejo paints are good too (editors note: Vallejo paints are excellent, but rather expensive for this task – best to stick with them for miniature wargames like Warhammer and the likes). I find that the paints I have suit me just fine.
Here is a list of colors I think you will need to start.
- White
- Black
- Royal Blue
- Bright Red (but not orangey…be careful)
- Silver
- Yellow
- A dark forest green
- A lighter army green
- A burgundy maroon color (optional)
- A nice raw sienna (brown but slightly orange)
- A burnt sienna…basically a standard brown
- A light grey
- A dark grey
- Maybe a gunmetal color…like a silvery black
- one or two shades of sandy camel color.
Any other color you might need you can generally mix from these colors. All in all you should be up to about $15-20 right now. I already had many of these at my house for some reason, but if you are just starting, this should get you going.
You also need some good tools. I, once again, went to Michaels and bought the smallest size brushes they had, and then to Publix for some thin wood skewers. With that and a sewing needle, you’ll be good. Here is a pic of my tools.
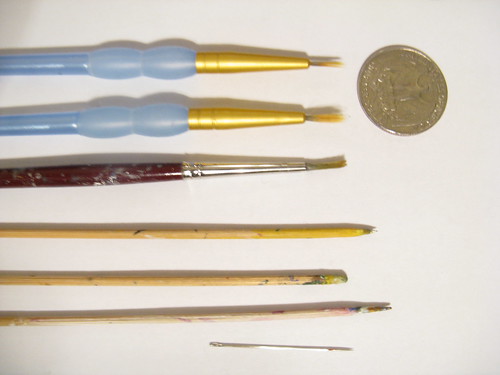
Basically I use the brushes for basecoating and doing any thick camo stripes or drybrushing, but almost all my fine detail work is done with a skewer and/or needle.
Just take one of the skewers and whittle it to a slightly finer point… experiment till you get a few. This is better than a brush because
- the point is smaller
- it is rigid and won’t bend when it hits the surface of the piece, giving you better stability and detail.
Then a needle for really fine stuff…like roundels and squadron letters.
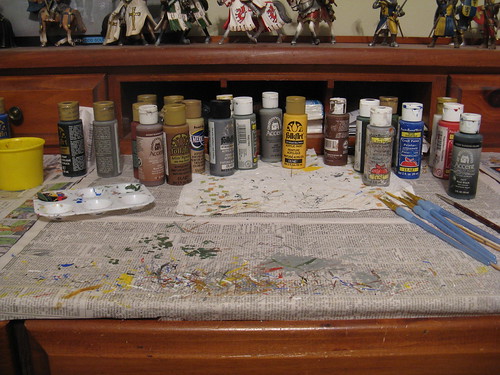
Grab a pallette, a cup with some water, and a section of an Styrofoam egg carton (the section WITHOUT tiny little holes in the bottom… I figured that out the hard way) for any inkwashing.
Then just set up your workstation with a newspaper and some paper towels, and you’re set!

I will be painting a few different kinds of pieces to cover the various techniques I use.
First, I’m painting the Chinese infantry. Then I will do part of the US Navy, then I will finish the RAF with some naval fighters and tac bombers, and finish up with the FMG Italian ground units (arty, mech infantry [armored car], and a tank).

A side note : Painting your pieces requires some practice, depending on how good you want them to look. For me, I “practiced” on a Spring 1942 set. In all honesty I thought they were good, but then I got progressively better and realized my original pieces were awful. Just have fun experimenting and painting and you’ll improve.
THE PAINTING PROCESS (INFANTRY)
To start out, infantry is probably the most time consuming type of piece to paint, but it is also one of my favorites. There are a few basic components to each infantry piece.
The base – Everyone does their bases differently. I have seen infantry with a base that is all one color, infantry with a base that is one color on top but a different color on the side (which is how I do it), bases with roundels painted on them, or even bases that are textured to look like the ground with moss, sand, etc. I like to paint the base 2 different colors because it gives more options for nations as well as giving it contrast, which can be pleasing to the eye.
The uniform – The uniform usually consists of pants or shorts, a shirt or coat, boots/shoes with socks, and a helmet or cap. Often you can paint boots over the socks if you like that better, or extend the shorts into pants…like I said, experiment with it to see what you like. I find that it helps to make the shirt and pants a different color for contrast.
The equipment – The equipment is usually a gun, (well, I would hope they would always have a gun  ) a canteen or pouch of some sort, and possibly a belt, strap, or sash looking thing. Its up to you to decide what you paint and what colors you use. Sometimes painting everything can make the piece look a little cluttered, but it can also be a nice touch. Obviously you paint the gun though.
The person/flesh – This is one of my favorite parts because I feel like it makes the piece look 10x better when it has a skin color; once again, it not only provides contrast, but gives a human look instead of plastic. Different soldiers have different skin colors, but its all pretty much a flesh tone base.
To start, I always paint the base…at least the top of it. It’s a lot easier to paint the base before the boots because you can be sloppy with your brush. Some people like to do an approach similar to how you put on your clothes. First you paint the skin, then the pants, then the shirt, socks, shoes, hat, and equipment. personally I find that it’s the best for me to paint the base, then the shirt, pants, hat, gun, accessories, skin, and then boots, and lastly the side of the base. The side of the base comes last because I usually hold the piece by the base or the head to provide easy rotation and a firm grip. But choose your method.
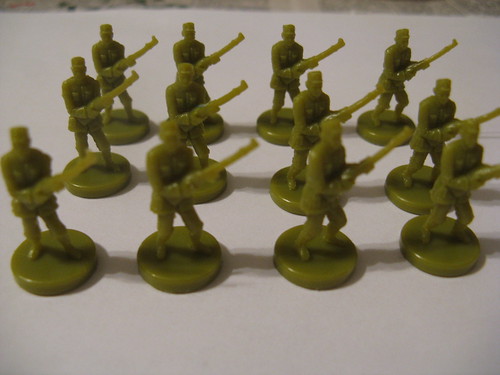
In Axis and Allies Pacific/Global there are 30 infantry pieces. I usually do 2 schemes for a nation, but for the UK and USA I will probably do 3 or 4 since you get double the standard 20-25 pieces. That being said, I am only showing you the first scheme right now (15 pieces).
Now, to start out, you have to clean the pieces with dish soap, warm water, and a toothbrush. The advantage to doing this is that often it helps the paint apply more easily because the oils from the factory will be off. It takes about 30 mins or so. You just get a pot or cup of warm to hot water (not hot enough to mold the plastic though…just tap water hot), add dish soap, and scrub! Make sure to get in all the nooks and crannies.
Update/Addendum: The pieces in this guide where not primed. I sprayed my French infantry pieces with primer to get the hang of it and to see how well it works. It’s GREAT! The pieces only require about 1 coat of paint with a few touch ups, and the paint applies very easily. I’m sold.
To spray your pieces with a primer (editors note : Krylon Fusion works best for plastics, imo), just set them on a piece of cardboard, and give them 2 light (keyword, light) coats of primer, the second coat after the other has dried. You should basically follow the instructions on the can – hold it about 10 inches away from the pieces.
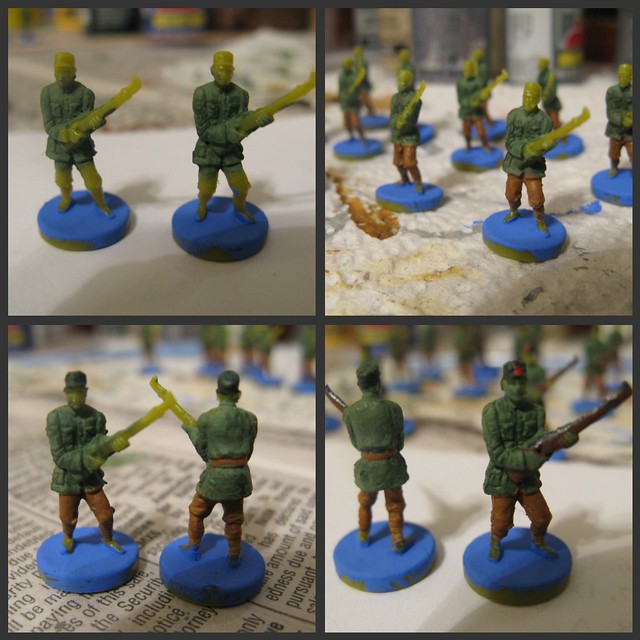
Now I painted the bases on my 15 infantry. It’s China, so I’m working with a light blue, bright green, white…those sort of colors. I decided to paint the top a light blue (not the royal blue) and the sides a bright green; not white because blue and white are what my American pieces have) Pick colors that will help you and anyone playing identify what nation they are. (Germany:black, red, gray; Italy:brown, green, white; UK: yellow, blue, red, white)
Next I mixed my color for the base. I wanted a lighter blue, so I mixed on drop or glob of white paint with 2 drops of royal blue, and then proceeded to stir with a skewer. Shake the paints very well so it’s not too thick or too thin. Make sure you mix it enough so it is evenly distributed: often when mixing you will have pockets or streaks of a certain color that will look funny when you put it on the piece. See the top right of the photo

Then apply the paint to the base…don’t worry about being sloppy because you’re coming back over it later. Just make it a uniform texture (no globs, etc). It will probably take 2 or 3 coats to completely cover all parts sticking through (fewer coats, as little as one, when primed properly before painting).
In the bottom left of the photo you can see the base, as well as the color I am going to paint the coats of the soldiers. I am doing a two layer coat…basically a base coat (no pun intended ) and then a darker color drybrushed/smeared on top to give it depth and variety. easy concept, and makes your piece look a lot better! That color is an “avacado” green (3 drops) with one drop of white.
When applying your paint, especially on infantry and ships, don’t put too much on or make it too thick because it can cover up or fill the details in the figure. So 2 coats is better than one really thick one. Just apply the paint uniformly and make sure you check all over the figure by rotating it and turning it upside down. There is nothing more frustrating then finishing a piece and finding a spot you missed- trust me! Places to check: the part where the left arm merges with the gun…it’s a part of plastic that connects them that doesn’t really exist in real life. Sorry if that’s confusing. Also check under the shirt or coat where it meets the pants, under the arm, and the cuffs on the shirt.
Next I applied a second coat to the infantry of a darker color (1 drop of dark green, 1 drop of light green). Its sort of a drybrushing technique…but not really. You basically get your brush with some paint on it, wipe of the paint a little but on a paper towel or newspaper, then dab or pull it across the piece so it leaves streaks or patches of that color on the piece. It sounds like it would ruin your piece, but it makes it look good and shadowed. On something like a ship or tank treads-basically something with clearly defined raised surfaces- it helps to pull the brush perpendicular to the surface. So on a tank tread, pull it left to right or right to left as opposed to up and down. That way you only paint the raised surfaces and it highlights those parts…more realistic and cool That technique worked very well for my Russian T34s. You can see the treads were painted that way, but there are also subtle light brown dry-brush highlights on clearly visible on the barrel and engine of the tank.

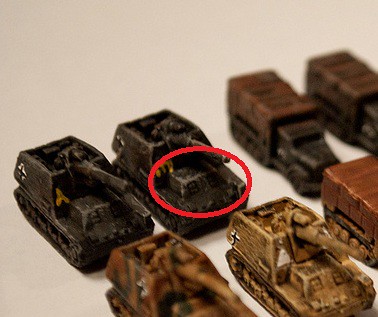
When drybrushing, periodically rinse your brush in the water so it doesn’t dry out and get ruined from paint…it will lose its tip and become a poofy bunch of fibers that isn’t useful any more. I don’t know if you can tell from the lighting, but the left piece (top left pic) is not drybrushed, while the right piece is. This is very clearly visible on ships…if you do a silver or gunmetal gray drybrush on the conning towers and such, it looks really cool!
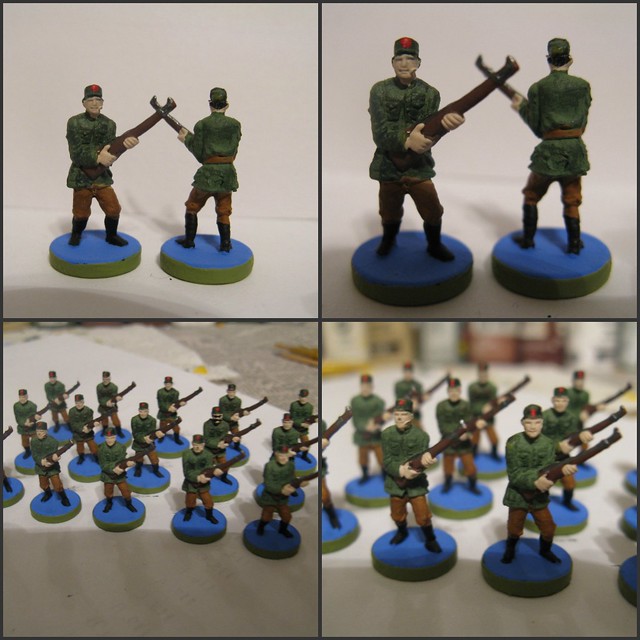
Then I painted the pants. I originally painted them a sandy tan color, but it looked dumb, so i painted a raw sienna over it. In the picture the pieces look a little spotty, but I paint over any spots I see while I’m painting. By the end they are all tidy.
Next I gave them dark green caps and painted the pieces’ belts brown. The belt was done with a skewer…everything else so far has been a fine brush.
Finally, I gave them a gun and a red dot on their caps (i’m making half of them Communist, half of them Nationalist…just for the heck of it. HISTORY!) The gun is a brown with a gunmetal grey as the guns metal parts. basically i painted the rings on the guns barrel, the gunsight on the end, and then I ran a line down the top to look like a metal barrel.
I finished the boots with a straight black. I used a thin point brush to get in between the legs on the inside of the boots. Afterwards I had to go back over the base a little bit to cover up any stray lines from painting the boots. That’s why it’s important to make sure you can replicate a pretty similar shade again when you first mix the base.
Then I just fixed up the uniforms with a straight dark green (that’s another bonus of using 2 coats of different colors… you can touch up with one straight color without mixing it and it doesn’t look bad)
For the base, I needed a green, but more of a bright, pastel colored green, not a dark forest or army green. So I mixed some blue and yellow (come on, back to the basic color wheel- 1st grade) until I found a shade I liked. Then you just apply it to the base and wick off any extra that sticks over the top of the side of the base with your finger.
Then you wait for it to dry, sit back, survey your pieces, make any changes you want, and be proud of yourself!
Here are the pics of the final infantry pieces;
One of those guys has a face defect-poor guy. must be hard missing half your jaw.
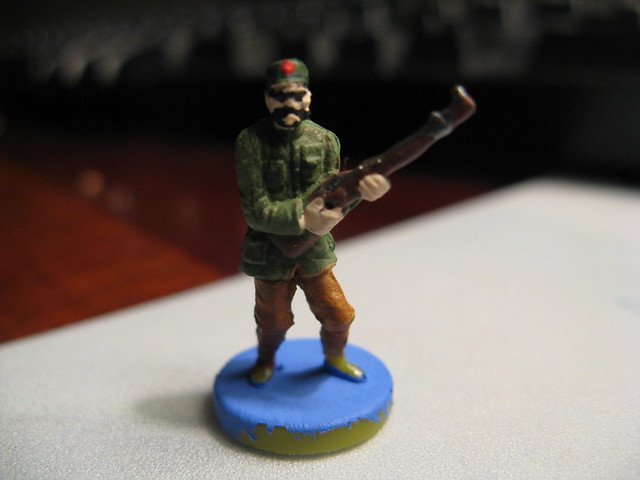
Every once in a while you have to have some fun as well. So here is an infantry piece with some “accesories”… Taliban infantry, Chinese Rambo…take your pick. He looks a little messy, but I fixed him up later, don’t worry
! 
THE PAINTING PROCESS (VEHICLES)
Here are pictures of other pieces. As you can see in the first frame, the pieces are lined up about 1-2 inches apart. In the 2nd frame the pieces have been painted with one coat of primer. The piece’s plastic still shines through a bit, but that’s good, because it means it is a light coat that doesn’t fill in the detail. Frame 3 is after 2 coats of primer. Priming really helps the painting process!! Frame 4 is after I painted a tan undercoat with acrylic paints.

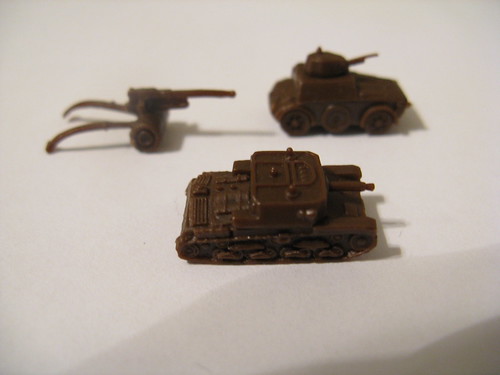
Here is a pic of one of the Field Marshal Games mechanized infantry pieces I finished up just to see how it would look. I actually like it as a desert scheme a lot!!

After the pieces were given a sand/camel color base coat, I did 2 or 3 coats of a brown inkwash, just because it kept coming out a little too light for my tastes.
The first thing I did after that was the tires of the artillery and mechanized infantry and the tracks of the tanks. The tires were pretty difficult to perfect with even circles, but after a but of tweaking I got it to the desired look. I used the sharpened skewer, as a brush isn’t stiff enough to get the tight cracks and smooth lines.
As you can see, especially on the artillery, there were stray black paint marks, but I went over those later with either a sand color or a gunmetal gray for the mechanics of the artillery.
I didn’t really like how plain the tanks were, so I painted the things on the back (they appear to be barrels, but they may be bundles of supplies) brown to add some interest and variety. For the mech inf I painted the jug of gasoline, the entrenching shovels, and the headlights/mirrors on the front to add the same variety. (they were part of the piece, but its optional to paint them)

A quick note on the treads (Frame 3): I don’t know how well you can see the grey, but it shows up more in person. If you did this by hand, painting each individual line it would take forever. So basically what you do on anything with clearly defined or raised parts is…yep, you guessed it, dry brushing.
I painted the tread brown, then selected a relatively stiff brush, and got started. Get the brush tip wet with some pain, then dry it almost completely off on a paper towel until you can barely see any paint coming off. Then do a rapid back and forth motion over the length of the treads…if you don’t see it at first, give it a sec and keep doing it- it will show up surely enough. By having little paint and doing it quickly you are ensuring the paint only comes off on the raised surfaces… ideally the tip won’t touch the depressions in the treads at all, only the raised parts.
Next it was time for the division and platoon markers. I did this because it
- Fills up the empty space on the side of the piece
- Gives the pieces more character in my opinion.
It is cool to see the different pieces with its own unique something. You may find yourself cheering on your HQ “black and white stripe” mech inf in the battle for Alexandria because it has withstood the enemy fire – it is now an veteran piece to be counted on!
Here is the site I used for inspiration. It is a great site for painting ideas – its a miniatures WWII battle site, but its great for this too. http://www.flamesofwar.com/Default.aspx?tabid=110&art_id=856&kb_cat_id=27
Add the platoon markings, do some touch up, add the Italian flag on the back (merely for identification) and voila!! You’re done.
They turned out fairly well if I do say so myself. Keep in mind when you’re painting your own pieces (I need to remember this often!!) that perfection isnt the goal. If there is a slight problem that you can’t quite fix, leave it. The piece should look good from table view (2 ft or so), so it doesn’t have to be an unblemished product.
Do your best work, and appreciate it. I can see some flaws in my pieces right now, but it’s not a big deal in the end. They look good from far away, and we’ll have fun with them.

ADDING CAMO AND OTHER COLORS TO YOUR VEHICLES
You will notice in this picture of my German armor, artillery and support pieces that there are 3 schemes.
- Desert
- Woodland
- standard black/grey (German Feldgrau)
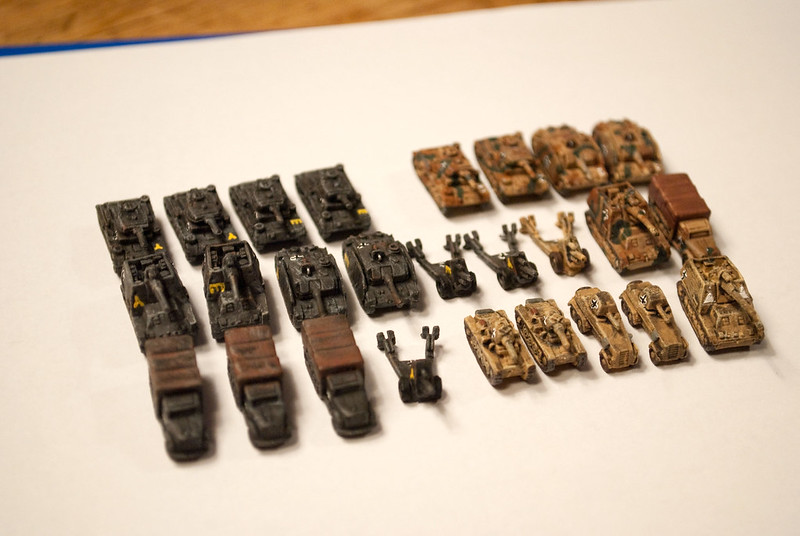
The woodland camo is a 3 step process :
- dark khaki color, based off of a photograph or drawing.
- burnt sienna brown in stripes and an occasional “splotch”, to simulate the camo.
- dark forest green overlapping the brown, making sure to cover most of the piece.
There are many different kinds of camo, but as a general rule, it looks better when it overlaps, when it’s not a predictable pattern (you don’t want parallel stripes running along the length of the piece), and when you cover the entire piece, then paint details over it. This makes it look more authentic in my opinion
To elaborate the process more;
I started with a coat of spray can primer, just a standard light gray primer from the hardware store. Then, I painted a base coat of dark gray on it. However, the base coat needs to be lighter than you intend the final product to be because of the wash. If I had gone with a near black gray from the start, the tanks would just be black and you wouldn’t see any detail and it would be nasty looking. The base coat was something like “Value 2” from this color swatch.

That’s the best estimate I can give you, since I didn’t take a picture of my paint when I was painting. I can tell you it was one of my dark gray paints with a bit of black mixed in to make it a bit darker.
After that, I did a wash with black. (I have black and brown; I just used the straight black wash. There’s a picture of further up in this tutorial). This was liberally applied, then I sucked up any thick pools of it with my brush until it was a decent amount left, mostly from the tracks and the hatch/MG at the top of the StuGs.
If you want the wash to really do it’s job, you should apply the wash one side at a time, setting the piece on it’s side to dry. That way it seeps into the tracks and the lines in between the side skirt panels or under the turret, depending on what you’re painting.
After the wash was completely done drying (20 minutes or so), I went back over and did a drybrush with a light gray. Something like “Value 4” or “5” from the image. This was applied pretty liberally, because I felt that I had gone overboard with the darkness and that the piece was too dark for what I wanted. But it’s all personal preference, so if you like the color you have, don’t worry about making the streaks and highlights show up everywhere. So it was applied liberally, and I really made sure to get the ridges on the Hummel and the skirts and turrets of the StuGs and Panzers, since these are the really defining parts of the piece, and the parts that have really defined edges and make for a great drybrush. This all gives it the “scratched paint” look, and since I did it enough, it sort of looks like there is a light gray base coat that I somehow covered up with gray, while it was actually the other way around. Here’s an example with the Hummel.
You can see it on the desert scheme Hummel as well. After the drybrush, I did a light drybrush with brown on the turret and MG, and the back a bit, just to simulate dirt and stuff like that. Very light drybrush though.
Then it was time to paint divisional markings and identifications, and then I was done.
Oh, the tracks. The tracks are done by dragging a brush with just a bit of paint across the tracks, and since they are raised (both the tracks themselves and the mechanisms), it makes your job really easy.
The Italian Battleship 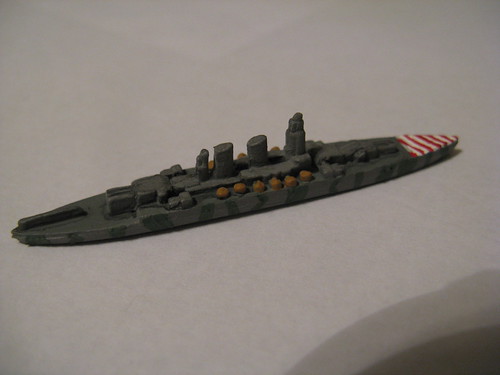
The Italian Aircraft Carrier.

The Italian Cruiser and Destroyer
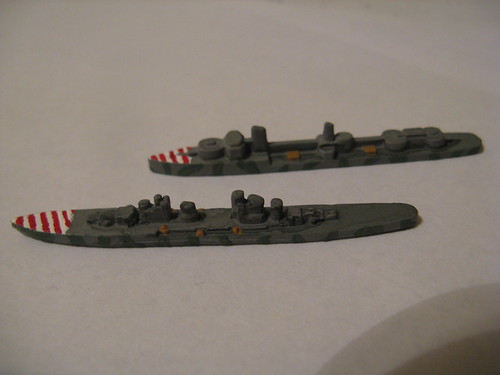
And last but not least, the Glorious Regia Marina
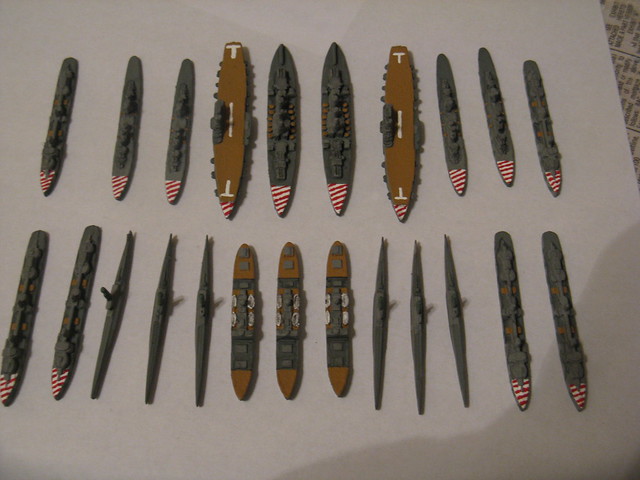
Note: The Italian subs will probably have an addition of a few colors to differentiate them from the US sub scheme.
ADDING SCENIC BASES (BASING)
So yesterday I whipped up some infantry and then practiced terrain basing … WOW, was I pleased with the results!!
Here are the materials I used.
- Cut out egg container – This is what I used to make the glue mixture… you can use something else if you want. If you DO use the egg carton, make sure there are not small holes in the bottom, as many sections have 2 small holes. I figured it out the hard way a while ago- paint wash all over my desk
- One fairly stiff brush – This brush should be one you do not cherish, and it should be a little bit stiff, so you can paint glue where you want it.
- Some terrain flocking – Pick what you want. I went to Hobby Lobby for mine… $8 total. You want it to be pretty fine.
- Tacky Glue– I would actually recommend PVA glue, but I couldn’t find any. So I used this. Its dirt cheap too.

To start out, paint your basic infantry pieces. The only difference is, the base of the piece needs to be the color of the terrain you’re applying instead of using national colors like before.
- Desert/Sand- Light brown or tan
- Grass/Forest- Olive Green
- Dirt/Rocks- Brown
- Cobblestone/Gravel/Urban- Grey
- Seasons- White (Snow), Burgundy (Autumn), etc.
Here are pics of my infantry. I painted them in 4 hours, which was actually remarkably fast, and they turned out to be my best work yet. 
Next, mix some of the tacky glue with a little bit of water… use your discretion. You need to stir it with a wodden skewer or your finger or something like that. You basically want spreadable glue. But not too much water!
Next, apply the glue to the base liberally.
Now, quickly spread the glue around the base, then sprinkle the terrain all over the base; put a lot on, because some will fall off. If it’s too clumpy, crumble it between your fingers while you do it OR you can dip the piece into the terrain materials.


Tap the pieces, brush off any excess around the base you don’t want, do some touch ups, and voila!!
Here are the final product. (The grey pieces I tried to paint, but they weren’t secure enough, so I couldn’t really get it to work… I’ll figure out a solution.) The usual disclaimer…things always look better in person, but here they are!

Check out more photos of painted Axis & Allies miniatures by Spitefire38 on flickr.
To discuss this more, join the conversation in the forums.